One more pic to keep people guessing.

 At The Back Of The Pack
Arm chair racerAt the back of the pack
At The Back Of The Pack
Arm chair racerAt the back of the pack
One more pic to keep people guessing.
The Goal... All I Need Is The Time...
At The Back Of The Pack
Arm chair racerAt the back of the pack
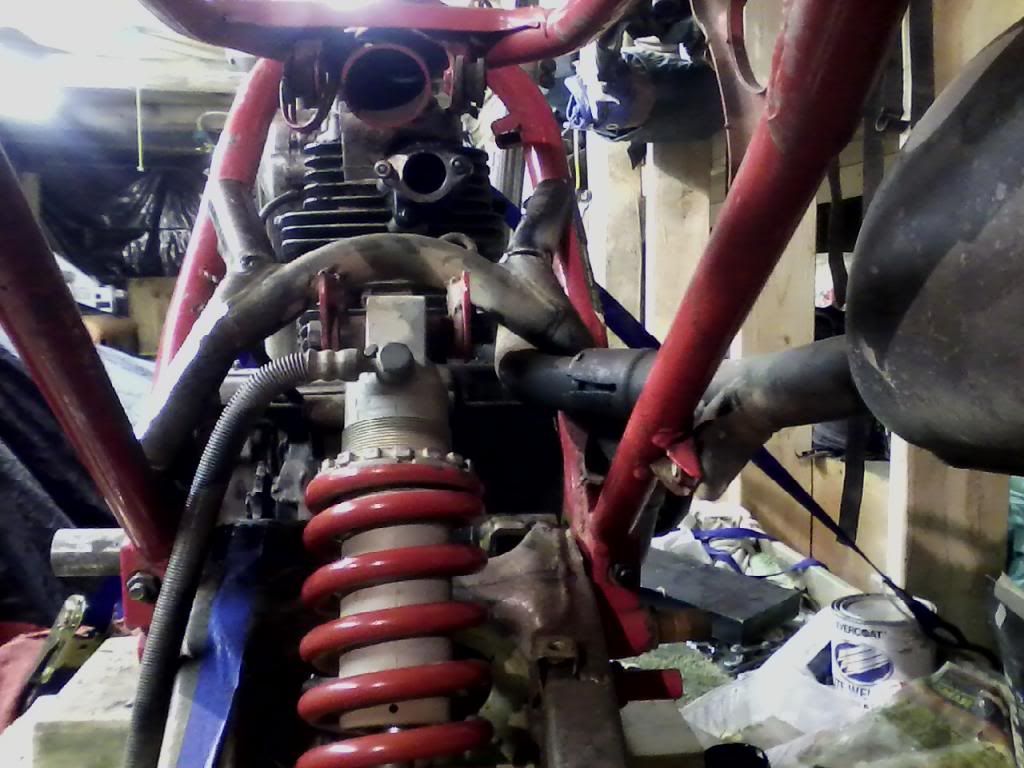
...and here is the WHY as to this little frame/suspension mod.
To make room for this little number. No way to make this setup work with the stock suspension on a 200x frame/swinger and a 1985-86 250R shock would extend too far up and into the way. Where there is a will...
Last edited by Dave8338; 04-08-2013 at 02:02 PM.
The Goal... All I Need Is The Time...
At The Back Of The Pack
Arm chair racerAt the back of the pack
Nice work!
~~ATC's Currently Owned~~
1983 Honda 200x - Main ATC
1985 Honda 200x - Parts Bike
~~ATC's Previously Owned~~
1983 Honda 250R
1984 Honda 200X
1979 Honda 110
1983 Honda 125M
1984 Honda 200
1983 Kawasaki klt 200a
1986 Honda 200s
~~Other Toys Owned~~
2012 Pro R 800
1993 Polaris Indy 500
2004 Yamaha 125
1990 Thunder Kart - 250CC
2001 Yamaha Blaster - 240kit, aftermarket exhaust, power reeds
Just Too Addicted
Arm chair racerJust too addicted
Yes nice work!!!!!And Hi and Welcome to this site..

86 Tri-Z
86 Honda 250R,
84 Tecate
At The Back Of The Pack
Arm chair racerAt the back of the pack
Sweeeeeeeeet!........and a Howdy from me to you
At The Back Of The Pack
Arm chair racerAt the back of the pack
looks like shes coming together!
nice job
~~ATC's Currently Owned~~
1983 Honda 200x - Main ATC
1985 Honda 200x - Parts Bike
~~ATC's Previously Owned~~
1983 Honda 250R
1984 Honda 200X
1979 Honda 110
1983 Honda 125M
1984 Honda 200
1983 Kawasaki klt 200a
1986 Honda 200s
~~Other Toys Owned~~
2012 Pro R 800
1993 Polaris Indy 500
2004 Yamaha 125
1990 Thunder Kart - 250CC
2001 Yamaha Blaster - 240kit, aftermarket exhaust, power reeds
At The Back Of The Pack
Arm chair racerAt the back of the pack
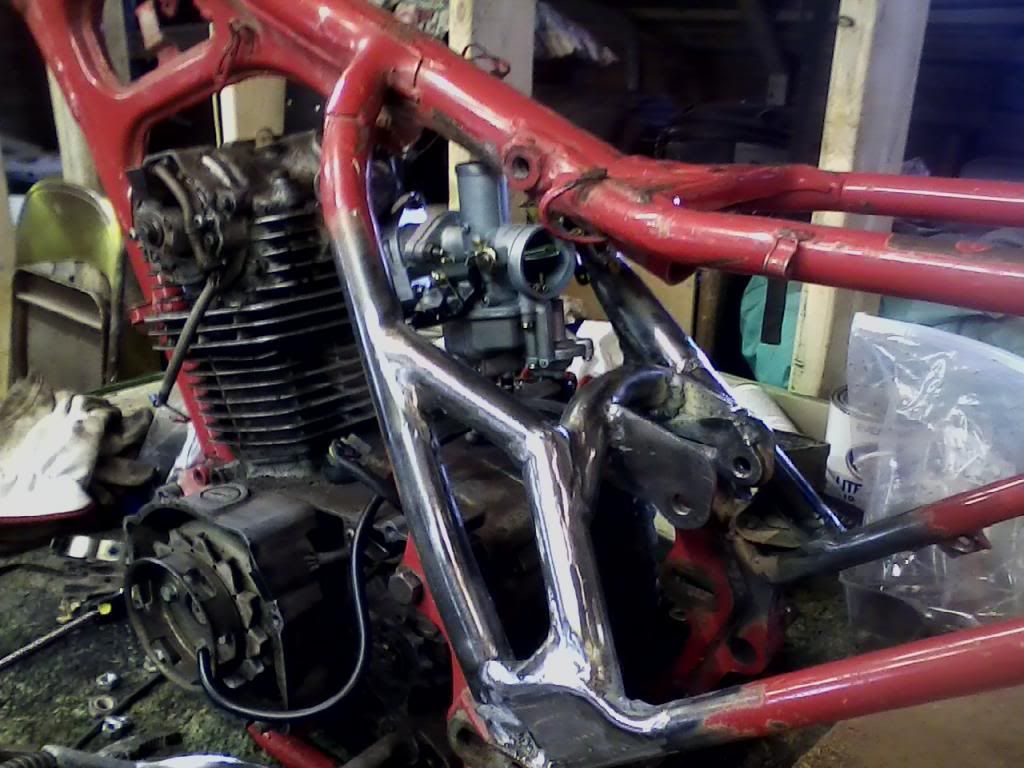
Hey... thanks, guys. Believe it or not, there is a method to my madness.
Here is what had to be done to the backbone in order to get the carb in and have a path for the cable routing.
The carb requires a splitter / Y cable that I need to make yet. One lead lifts the slide and the other actuates the accelerator pump.
Just to be clear, the engine that is sitting in the frame is NOT the one that will stay in the bike. It is there for building purposes and testing. The real mill, has yet to be completed (next winter in the wood shop). And the carb and intake pictured, will only be used on the new engine but the frame changes had to be made, either way.
The Goal... All I Need Is The Time...
First Time Rider
Arm chair racerNew to the board
That sounds familiar!Originally Posted by Dave8338


Fred
Retired Army Guy
1982 Honda ATC 185S
1985 Kawasaki KLT160
At The Back Of The Pack
Arm chair racerAt the back of the pack
Making spacers for the sprocket hub to offset the sprocket/chain 21mm inward towards the center of the machine. As mentioned, alignment or should I say clearance was going to be close. Also chose to add a little length to the linkage mounting tabs on the swinger in order to gain a bit more ground clearance. This results in a loss of travel by 1/2" so total suspension travel will be just south of 8". Was willing to make that sacrifice as I don't plan on getting this thing air born and also didn't want to drag the dog bones through every puddle. Rear wheels are Douglas with Holeshots mounted. Kenda Front Max. Not going for a flat tracker nor a mudder. Just a comfy hammock suspension that IF I've done my math correctly, should do the trick. We'll see...
The Goal... All I Need Is The Time...
New to the board
Arm chair racerNew to the board
Welcome dave....Looks like a fun project!
At The Back Of The Pack
Arm chair racerAt the back of the pack
Received a few more crucial parts yesterday. This thing is going to come down to the wire as far as the next weekend deadline !!
Likely won't have the rear plastics mounted (had to cut the original 200X seat latch mount out of the frame and rework it so it fits the 185S seat/fender combo) so I may have to settle for a plywood seat and a few zip ties to hold it in place. HEY... I could call it a Cafe Style trike and consider it done. NOT ! Here is a pic of that and the shortened lower linkage:
This evening will be mounting up the chain guide/tensioner on the front, topside of the swing arm. If I can get it right, I shouldn't need a spring mechanism as I'm using a guided roller for the 520 chain. The "plan" is to mount it so that as the swing arm moves up, the cam-roller rotates forward on the axis and keeps the tension equal between the roller and the front drive sprocket. By doing this, I should be able to go without the chain slider on the front of the swing arm. ALL speculation at this point but I will know in the next 24 hours if it is going to work.
Time will tell...
The Goal... All I Need Is The Time...
At The Back Of The Pack
Arm chair racerAt the back of the pack
Here is a shot of the 21mm spacers that offset the sprocket inward. Turned out well. I only took the time to shape one of the spacers at this point as I'm running out of time. I'll do the other three when I have a little more time to play.
Had to do a bit of filing and shaping on the bearing carrier and sprocket to get things to clear but nothing major.
The Goal... All I Need Is The Time...
At The Back Of The Pack
Arm chair racerAt the back of the pack
Frame and swinger are painted. New bearings on the front of the swing arm, and sealed rollers for the bearing carrier that I hope to have in tomorrow, if all goes well. I intend to keep all of the original 86 hardware on the pivot bolt so there is going to be a it of a trick, in order to retain the bearing seal washers, in the game. For this weekend, I'll go without the inner seal washers. When done, they will be there...
The Goal... All I Need Is The Time...
At The Back Of The Pack
Arm chair racerAt the back of the pack
We have paint ! Nothing too fancy but I wanted it in gloss black like the 185S was. Red just wouldn't look right, IMHO. Swinger is done in Gold Metalic that is a good match to the Pro Link decals. Just something to keep it from rusting for now. Had the paint on hand so why not.
Cleaned up and ready for primer:
And some High Gloss Black:
Assembly will happen on Friday. Hope to have it all together and ready for some testing by Sunday morning.
The Goal... All I Need Is The Time...
At The Back Of The Pack
Arm chair racerAt the back of the pack
Bearings and seals in the carrier and the axle cleaned, prepped, and clear coated. Paint up the motor mounts and foot pegs, bars, and make my plywood seat, tonight. Tomorrow things go together.
Saturday, bring the thing to work and leave directly from work to the "party". I'm saving the electrical for Saturday evening and Sunday I hope to ride...
The Goal... All I Need Is The Time...

 Reply With Quote