//ArrowChat Code
Page 1 of 5 1 2 3 ... LastLast
Results 1 to 15 of 66

Thread: 1982 Honda ATC 185s Rebuild

  1. #1
    Join Date
    Jun 2013
    Location
    Georgia
    --
    53

    Wink 1982 Honda ATC 185s Rebuild

    Hello again everyone.
    I have a few questions as I am rebuilding this bike.
    I have almost the entire frame apart (engine will wait till I have parts).
    I took apart the front forks and the bearings are just loose, the cage was gone, just the balls remained.

    Where can I get the replacement bearings and what type are they called?

    Starting Break down:
    Click image for larger version. 

Name:	1.jpg 
Views:	1628 
Size:	277.0 KB 
ID:	171298 Click image for larger version. 

Name:	2.jpg 
Views:	1205 
Size:	282.8 KB 
ID:	171299

    Frame Stripped
    Click image for larger version. 

Name:	3.jpg 
Views:	251 
Size:	75.2 KB 
ID:	171300 Click image for larger version. 

Name:	4.jpg 
Views:	338 
Size:	254.4 KB 
ID:	171301 Click image for larger version. 

Name:	4-2.jpg 
Views:	589 
Size:	249.5 KB 
ID:	171302

    Rear Plastic / Seat
    Click image for larger version. 

Name:	5.jpg 
Views:	131 
Size:	13.8 KB 
ID:	171303

    Front Forks
    Click image for larger version. 

Name:	6.jpg 
Views:	165 
Size:	89.4 KB 
ID:	171304

    Handle Bars and Wiring Harness (re-wrapped and leads put on)
    Click image for larger version. 

Name:	7.jpg 
Views:	283 
Size:	259.4 KB 
ID:	171305

    Brake (missing Spring) had to get some Quicksteel to repair after I bent it back.
    Click image for larger version. 

Name:	8.jpg 
Views:	139 
Size:	84.4 KB 
ID:	171306

    Engine before/after re-wrapping wiring and putting leads on
    Click image for larger version. 

Name:	9.jpg 
Views:	186 
Size:	252.6 KB 
ID:	171307 Click image for larger version. 

Name:	10.jpg 
Views:	131 
Size:	68.8 KB 
ID:	171308

    Work Bench lined up
    Click image for larger version. 

Name:	11.jpg 
Views:	118 
Size:	237.4 KB 
ID:	171309

    Tank photos after painting
    Click image for larger version. 

Name:	12.jpg 
Views:	176 
Size:	74.6 KB 
ID:	171310 Click image for larger version. 

Name:	13.jpg 
Views:	93 
Size:	86.3 KB 
ID:	171311
    Click image for larger version. 

Name:	14.jpg 
Views:	124 
Size:	15.8 KB 
ID:	171312 Click image for larger version. 

Name:	15.jpg 
Views:	115 
Size:	95.4 KB 
ID:	171313
    Click image for larger version. 

Name:	16.jpg 
Views:	112 
Size:	218.5 KB 
ID:	171314 Click image for larger version. 

Name:	17.jpg 
Views:	98 
Size:	236.8 KB 
ID:	171315

    Front wheel with Brake Hub removed
    Click image for larger version. 

Name:	18.jpg 
Views:	120 
Size:	246.6 KB 
ID:	171316

    Front Brake hub (half of it is missing)
    Click image for larger version. 

Name:	19.jpg 
Views:	134 
Size:	275.4 KB 
ID:	171317
    Last edited by Amazon3d; 06-14-2013 at 08:02 PM.

  2. #2
    Join Date
    Jul 2009
    Location
    South Florida
    --
    6,727
    Go to dratv.com and have fun
    http://www.dratv.com/atdrwhandti.html


    Quote Originally Posted by Amazon3d View Post
    Hello again everyone.
    I have a few questions as I am rebuilding this bike.
    I have almost the entire frame apart (engine will wait till I have parts).
    I took apart the front forks and the bearings are just loose, the cage was gone, just the balls remained.

    Where can I get the replacement bearings and what type are they called?

    (Will post pictures tomorrow)
    78 atc 90/180cc Dickson Full Suspension
    76 ATC90/180cc Nicholson
    77 atc 90 Dickson Full Suspension
    84 KLT 110/123cc Powroll Racer from 80s
    87 atc 125m stock
    84 atc 200x Curtis Sparks
    84 atc 200x Powroll My race bike from 80's
    83 atc70/108cc Powroll blue Xmas Special
    81 atc185s HP-ATC full suspension

    Performance Shop is Open PM me for Service

    My Feedback http://www.3wheelerworld.com/showthr...ck+shortline10

  3. #3
    Join Date
    Aug 2008
    Location
    MN
    --
    3,260
    Are you referring to the steering stem bearings? Thats how Honda's are, they have a race and loose ball bearings that ride in that race, there is no cage holding the bearings they are simply pinched in place as the steering stem is tightened.

    As for replacing them if they are sloppy and loose the best way is an All Balls roller bearing kit to replace them. The only hard part is removing the lower bearing race from the bottom of the fork stem.

    Here is an example...

    http://www.ebay.com/itm/HONDA-ATC-70...5d7e7d&vxp=mtr
    ---------------------------------------------------------
    1984 Honda ATC200ES "Big Red"
    1982 ATC200E "Hondie"
    1988 TRX300FW "Project Quad" Still in progress....

  4. #4
    Join Date
    Jun 2013
    Location
    Georgia
    --
    53
    By removing the lower race is that the cup that holds the balls? Do I have to knock it out and just use that kit?

  5. #5
    Join Date
    Jul 2009
    Location
    South Florida
    --
    6,727
    If your talking about the steering stem bearings their is no cage that holds them . When installing them use a thick grease on the race and place the bearings on the race carefully and the grease will hold them in place during installation .


    Quote Originally Posted by Amazon3d View Post
    By removing the lower race is that the cup that holds the balls? Do I have to knock it out and just use that kit?
    78 atc 90/180cc Dickson Full Suspension
    76 ATC90/180cc Nicholson
    77 atc 90 Dickson Full Suspension
    84 KLT 110/123cc Powroll Racer from 80s
    87 atc 125m stock
    84 atc 200x Curtis Sparks
    84 atc 200x Powroll My race bike from 80's
    83 atc70/108cc Powroll blue Xmas Special
    81 atc185s HP-ATC full suspension

    Performance Shop is Open PM me for Service

    My Feedback http://www.3wheelerworld.com/showthr...ck+shortline10

  6. #6
    Join Date
    Jun 2013
    Location
    Georgia
    --
    53
    Thanks Shortline, I've just never seen loose bearings in a steering stem like that before, they've always had a cage that held them in, unless the cage was broke.
    Posting pictures of progress now!

  7. #7
    Join Date
    Aug 2008
    Location
    MN
    --
    3,260
    Quote Originally Posted by Amazon3d View Post
    By removing the lower race is that the cup that holds the balls? Do I have to knock it out and just use that kit?
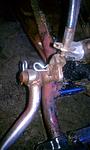
    Yes, you have to remove the lower race up in the downtube but also the race that is on the stem on the forks, most guys cut it with a cut off wheel or grinder being careful not to nick up the stem because its pressed down on the stem and you can't just pry it back off.
    ---------------------------------------------------------
    1984 Honda ATC200ES "Big Red"
    1982 ATC200E "Hondie"
    1988 TRX300FW "Project Quad" Still in progress....

  8. #8
    Join Date
    Jun 2013
    Location
    Georgia
    --
    53
    Is a 81' 200s exhaust compatible with 82' 185s?

    Cleaned up the engine a good bit, also got a lot of rust off parts, have to coat them now.
    Picked up some heavy duty grease to do the steering stem bearings with.
    I'll snap some more photos later today.

  9. #9
    Join Date
    Jul 2009
    Location
    South Florida
    --
    6,727
    No such animal as a 81 200s LOL 200s came out in 84 . It should work but mounting tabs might be different .
    78 atc 90/180cc Dickson Full Suspension
    76 ATC90/180cc Nicholson
    77 atc 90 Dickson Full Suspension
    84 KLT 110/123cc Powroll Racer from 80s
    87 atc 125m stock
    84 atc 200x Curtis Sparks
    84 atc 200x Powroll My race bike from 80's
    83 atc70/108cc Powroll blue Xmas Special
    81 atc185s HP-ATC full suspension

    Performance Shop is Open PM me for Service

    My Feedback http://www.3wheelerworld.com/showthr...ck+shortline10

  10. #10
    Join Date
    Jun 2013
    Location
    Georgia
    --
    53
    Well guess that they have it labeled wrong, looks like a 185s exhaust though.

    More photos!

    Mounting hardware came in from Lake-shore ATV Salvage, they look almost mint and for $20 shipped too!
    Click image for larger version. 

Name:	23.jpg 
Views:	93 
Size:	245.4 KB 
ID:	171391 Click image for larger version. 

Name:	24.jpg 
Views:	113 
Size:	247.7 KB 
ID:	171392

    Engine de-greased and Primed.
    Click image for larger version. 

Name:	25.jpg 
Views:	117 
Size:	261.5 KB 
ID:	171393 Click image for larger version. 

Name:	26.jpg 
Views:	209 
Size:	268.4 KB 
ID:	171394
    Click image for larger version. 

Name:	27.jpg 
Views:	113 
Size:	240.0 KB 
ID:	171395 Click image for larger version. 

Name:	28.jpg 
Views:	115 
Size:	168.9 KB 
ID:	171396

    Started on repainting frame after de-greasing the frame (quite the job)
    Click image for larger version. 

Name:	29.jpg 
Views:	124 
Size:	72.5 KB 
ID:	171397

    Painted CDI cover
    Click image for larger version. 

Name:	30.jpg 
Views:	102 
Size:	47.8 KB 
ID:	171398

    Painted Shifter (Yes red, wanted to accent the engine which will be black)
    Click image for larger version. 

Name:	31.jpg 
Views:	84 
Size:	138.8 KB 
ID:	171399
    Last edited by Amazon3d; 06-15-2013 at 07:59 PM.

  11. #11
    Join Date
    Jun 2013
    Location
    Georgia
    --
    53
    On to new questions: Should I rebuild the top end; I checked inside the exhaust while I had it hanging and found large deposits of carbon, some I cracked off as large as 1/3-1/2" long. I cleaned it out the best I could with my pick but it still looks pretty carbon coated. I've never tore down a top end before.

    Also my oil cap has a crack in the lip (chip too) and after 1/4-1/2 turn it will slowly drip oil (very slowly), should I replace this or is it fine for now?

  12. #12
    Join Date
    Aug 2008
    Location
    MN
    --
    3,260
    Pretty common for them to carbon up, was the motor smoking (burning oil) at all? If not then i wouldnt tear into it, just clean out the exhaust port on the head.

    I would replace that oil cap, you mean the dipstick or? A small leak will become a big leak eventually. And you don't want oil leaking all over your freshly painted engine and frame. Speaking of paint, be careful on the spark advancer i see you painted over it and the pickup, if you get paint buildup on the magnet end of the advancer it will hit the pickup coil, small gap between them.
    ---------------------------------------------------------
    1984 Honda ATC200ES "Big Red"
    1982 ATC200E "Hondie"
    1988 TRX300FW "Project Quad" Still in progress....

  13. #13
    Join Date
    Jun 2013
    Location
    Georgia
    --
    53
    I honestly don't know if the engine smoked or not. I haven't had it running yet.

    The dipstick is missing, but the cap at the bottom with the oil screen has the crack, 22mm nut size I think (have to pick up a few sockets).

    Also would this LINK carburetor be worth getting? I don't want to buy a $300 racing carb for a 185 because I may end up selling and upgrading to a larger trike.

    Any thoughts on my mounting rig lol

  14. #14
    Join Date
    Jul 2009
    Location
    South Florida
    --
    6,727
    24mm is the oil drain plug size . For now you can use a valve tappet cover , its the same size and wont leak unless the motor is running .
    78 atc 90/180cc Dickson Full Suspension
    76 ATC90/180cc Nicholson
    77 atc 90 Dickson Full Suspension
    84 KLT 110/123cc Powroll Racer from 80s
    87 atc 125m stock
    84 atc 200x Curtis Sparks
    84 atc 200x Powroll My race bike from 80's
    83 atc70/108cc Powroll blue Xmas Special
    81 atc185s HP-ATC full suspension

    Performance Shop is Open PM me for Service

    My Feedback http://www.3wheelerworld.com/showthr...ck+shortline10

  15. #15
    Join Date
    Jun 2013
    Location
    Georgia
    --
    53
    It will leak if the motor is running? I thought they were the exact same? It doesn't leak if its tightened.

    Also I won the bid on my exhaust, $0.99 + $24.25 shipping = Happy Camper Pic below.

    Click image for larger version. 

Name:	$(KGrHqUOKpwFGy-OgyciBRtM,3gWYQ~~60_12.JPG 
Views:	109 
Size:	24.9 KB 
ID:	171435
    Click image for larger version. 

Name:	$(KGrHqNHJFIFGWjuvTzqBRtMb,nU9g~~60_12.JPG 
Views:	111 
Size:	25.9 KB 
ID:	171436

//ArrowChat Integreation Code //