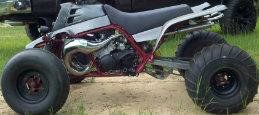
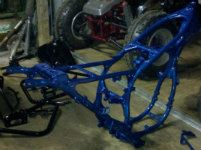
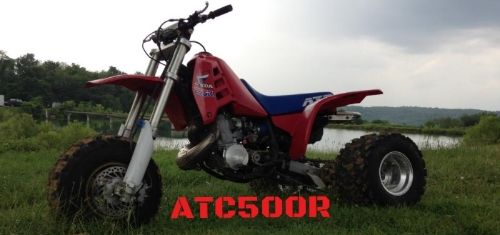
I've always been fascinated with the hybrid engines...back before it was common to have pro-x cylinders, pumas, sabres, sphinx's (What strange names, anyways) the true custom build engines that used the Polaris sport 400L cylinders, the CR500 cylinder on 250R bottom end conversions, the Pilot 400 cylinders on 250R bottom ends, and the Rotax topend conversions were all relatively popular. These sorts of builds intrigued me, mostly because they were just so out there in terms of creativity and design. I think we can all admit we kind of like oddball junk, obviously.
So in 2010 I started collecting parts for a Rotax (400cc) conversion. I gathered up some damaged 250r cases for relatively no money ($15-$20 here and there, most of them beyond repairing, some not). I bought a Ski-Doo MXZ800 cylinder that needed replating, and a stock head that had been damaged in engine failure. I think I had about $120 in both of those parts with shipping. I got the cylinder and sized it up with the stock 250R cylinder,
The cylinder, the cases, and the head, pretty much before any work had been done.
After that, I had my dad turn some aluminum pieces on the south bend to thread into the existing 250R stud holes since they weren't anywhere near going to match up. Dad and I had talked about a sort of fixture to bolt the cases to (Basically, an engine stand) to be able to work on them in the mill. I had cut a piece of 3/4in plate one day and other than that, stuff had just been laying there. I got to looking at it, and frankly, I was kind of intimidated. There was going to need to be A LOT of machine work done, something that admittedly is not my strong point with my skills or antiquated equipment. And there were a lot variables involved. After that, the stuff laid and kicked around my shop for 3 years. One thing or another came up. I was building swingarms in the little spare time I did have, work was making me go batty, life in general, etc....Stuff just got piled up, and I sort of forgot about it.
Fast forward about a month ago, I seen an ad on Craigslist for a bench top bead blasting cabinet for $40 locally. Been wanting one for years and never had one, figured I'd go pick it up. After I got the thing home and replaced the glass in it (~$12 at Lowes, and you can actually see through it now) I just about tripped over the cases I had originally set out to do this with, and I kind of just threw them in the bead blasting cabinet to experiment with. Kept having to dick around with air pressure levels, clogging and unclogging the blast nozzle, you get the idea. But, the cases ended up cleaning up really nicely. Then I got to looking at them and I was like, "You know what, this might be way out of my league on the machining side of things, but I don't give a, I'm gonna try and make this work". Luckily I have a whole other complete 250R motor sitting in a tote, so these cases are basically my trial run. If they end up being usable, all the better, but I didn't want my first attempt to be on a good usable set of cases.
I tend to over complicate things sometimes, and thatís not always a real productive trait. If anyone is familiar with Nikola Tesla, in his autobiography, he talks about how for his first alternating current motor, he designed the entire thing (and I mean, the entire thing) in his head before physically building it. He ran through every single machine part, and actions required to build and manufacture those parts, the assembly, and subsequently running it (for months, he said), analyzing expected wear and part failures, all using his imagination and mind before the first work tool was ever picked up. Fascinating, really. A lot of times, I try and do that, and well its easy to get wrapped up in thinking about something and not just actually DOING something. Tesla could pull that sort of thing off, I try, but canít. And so with that realization, it pretty much all finally began... Sometimes you gotta just doand cross that bridge when you come to it.
This was setup to just do a rough cut on the threaded in pieces to go where the old studs were, no serious machining.
First thing was to finish the fixture/engine stand thing. It looks a little crude in person, but its made with ĺ plate and 3/4in square bar stock that bolts to the plate, and then the bottom engine mount tabs are welded to that, so you can shim it pretty much however you want basically to level the top up. After quite a bit of time studying and looking at things again, I decided the next thing I needed to do is bore the cases so the sleeve of the new cylinder would fit down in there. From there I could square up the cylinder, see where I needed to add weld around the base gasket surface, see where my stud holes would fall at, all that jazz. Originally, I was going to just use the digital read out on the one new(er) mill I have to locate the center, but after turning it on the first time in a few years, it didn't work, and I couldn't seem to make it come on, so, went back to sort of the old-fashioned and rednecky way of making a centering tool. Basically, a chunk of billet that would fit in the quill of the milling machine, and fit down into the center cases with exacting tolerances. After that, the table could be locked down, the centering tool swapped out, and put in the boring bar. Easy. (Sort of...) Making this piece ended up being a little trickier than I thought, because I had not considered the sides of the cases where the transfer ramps are making it not really a round area. So basically, we had to turn a piece to fit there, and then I had to mill the sides off to fit down inside. It ended up looking sort of like a funky piston.
While dad was working on making the centering tool, I took the OEM cylinder head and marked it out, and cut it in half on the Bandsaw. Youíll see it with the big gaping hole directly into the water jacket in a few pictures below. I later on welded it up, but I have yet to go ahead and make a water spigot location for it. That'll be coming later on.
After the centering tool was finished, I went over to the good mill (The one in my shop I use for tube notching is just too wore out for about anything but that) and setup the cases in the stand dad made, and basically locked it down with the setup blocks. Now, leveling this thing in and centering it up in the manner I did is for sure not the recommended manner. Iíve never been formally trained as a machinist and neither has dad, so our methods are not technically correct or entirely accurate all the time. Re-use my directions and steps at your own risk, Iím probably doing it wrong and just havenít figured it out yet.
With that being said, I put in our centering tool, dropped it down into the cases. The tool was made with a lip on the top of it that basically allowed it to bottom out on the top of the gasket surface. What I did from there is basically run a feeler gauge between the edge of the lip and the top of base gasket surface and kept adjusting things till I had about .003 difference from one side to the other and then gave up. And after reflecting on this, I decided that was most likely the difference from my cases halves not having originally been a machined set. So, after that, the boring bar went in, measured and set the depth I needed to go, and kept taking a little bit at a time. It appeared to be tracking really square, didnít look like one side was cutting off more than the other anywhere, so I took that as a good sign. By the time I stopped, the area was razor thin until I had cut through entirely into the open areas in the case casting.
The cylinder was a very good snug fit, in fact I was able to just get started and then I took the boring bar out and sort of made an arbor press out of the mill and gently pressed the cylinder on down in till it bottomed out on the remainder of the fill ins for the old studs. Laid the head down on top of it, and posed for a photo!
So, after that, got to do some real sizing up of the cylinder on the cases and what areas needed welding. The rotax cylinder, the transfer tunnels on the sides are actually narrower and skinnier than a 250R. This is a by-product of it being designed and made for a twin cylinder, for sure. So, sort of surprisingly, the most welding needed to be done on the inside of the existing base gasket surface. A little bit on the outsides to help square it up. If your familiar with the 250Rs, their base gasket has a more rounded elliptical shaped pattern on the bottom. The rotax one, it is damn near square.
While I was in the process of welding on the cases I had a nice electrical explosion in the shop (no injuries, thankfully) but other than that, the cases welded fairly well and turned out pretty nice. We were able to patch up the line enough for the welder to tie in and finish, but the line running to the mill is still offline. It had been a while since I did some serious aluminum welding so I was pretty happy with the success of it. Looking back at it, now that I know the areas that need the welding well enough, I wouldnít need to bore the cases first. Iíd do the welding, then do the boring/surfacing/studs all in one machine action without having to remove from the mill and re-setup. But for this initial run through, I had to basically do it this way, to figure out how to do it better. I had a base gasket, but it was kinda hard to use that by itself and really get a good idea of where exactly stuff was going to fall at without just basically building up everywhere with weldÖ
The above pictures are the 95% finished view. After the welding was totally completed, I moved onto filling in the casting pockets with an aluminum putty, since they werenít feasible to weld due to the depth. More on that in the foot notes at the end.
It ainít pretty, here, but itíll look a lot better once it gets machined and surfaced off. Your probably wondering what that extra weld up in the front is from. Well, thatís a bit of a story in and of itself, the foot notes at end on that also. Right now I'm kind of at a stand still till the 220v line to the mill gets back up and running, at which point I'll set everything back up, and work on surfacing the top off completely level, and then locating/drilling/tapping the stud holes. I'm hoping over the weekend I'll get some time to do that and get the top machined down. I will post another update soon.
Foot Notes:
Three things Iíve ran into so far that you should know about and consider if you attempt this.
#1, the pockets in the top of the cases are going to have to be filled. For gasket surface area, and also for the exhaust side cylinder studs. The most perfect, ideal solution, would be a similarly casted aluminum blank to drop in and weld/build up a little on the top and be done. In the future, I might try that. On this one, I opted for Devcon Aluminum expoxy putty, type F. I did a lot of reading and research, and barring their titanium version that you can use to build up hydraulic rams and shafting with, this is about the next best thing to being aluminum itself. I just mixed the stuff up, filled in those pockets, put some extra on top so it could be machined off back with the rest of the base gasket surface when ready. It cost me about $55 for a 1 lb container, and that would have probably done atleast 2, probably 3 sets of cases.
#2, the back intake side studs, look very carefully where they end up falling at. You have to actually weld under and IN the cases below the gasket surface because of how the casting is shaped, in addition to the top. For example, youíd fill in the top, and then as youíre drilling the location for your new stud, pop into a pocket with no material say about a Ĺ in further down below. Thatíd be no fun at all remedying.
#3, unlike the 250Rs, the rotax cylinder flows water completely through it, top to bottom. The 250R cylinder basically only circulates around the top half, and then goes out the neck back above the intake. The Rotax cylinder, goes all the way down to the bottom. As it was originally equipped, it ran the full height, down through the bottom of it into a water cavity in the crankcase where the actual water pump is on the MXZ800 snow mobiles. In my, shall we say, ignorance, I didnít realize this till I was sort of in a pickle. The holes are relatively small, 5/16ths diameter at best. But I had just noticed and realized this while I was doing the final welding and prep before I start pouring the epoxy to fill in the pocketed areas. So I decided to add weld and build up that area too. Then as I was welding it, I realized, that inevitably, I was going to have a gap at the case seams, unless I was going to split the cases and weld along the edge, and then subsequently surface that center gasket area off tooÖwhich, I didnít particularly like the thought of, but might ultimately end up having to do. My current school of thought is to just plug the cylinder so that water doesnít get down that far, weíll see.


 Reply With Quote


