//ArrowChat Code
Page 13 of 15 FirstFirst ... 3 11 12 13 14 15 LastLast
Results 181 to 195 of 224

Thread: 1984 ATC300R Fooler build

  1. #181
    bigdaddyvw185's Avatar
    bigdaddyvw185 is offline At The Back Of The Pack Arm chair racerAt the back of the pack
    Join Date
    Mar 2013
    Location
    Seymour CT
    --
    314
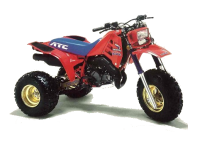
    I stopped in at my local autozone today for a fuel filter for my tractor and started browsing for an intake tube to go from the intake box to the carb, 3'' on the air box side and 2 1/4" on the carb side. and to my surprise they had a spectro step down that worked rather nicely! ended up having to trim 1/2 of an inch off of it on the intake box side for it to fit properly but i am happy to report that it is going to work great!
    Also want to add a special thanks to DohcBikes for supplying me with a functioning front brake caliper since i discovered that the previous owner of my caliper had ground down the caliper body which made the outside pad sit crooked when the brakes were applied. But anyways some replacement parts for the caliper will be here within the next couple days so that will be all good to go!
    I have not been able to get out in the barn much lately (started a new job at a local motorcycle / powersports shop) so when i was able to barn today and get the air box all figured out i figured id give the thread an update.
    Click image for larger version. 

Name:	038.JPG 
Views:	28 
Size:	1.55 MB 
ID:	191285Click image for larger version. 

Name:	012.JPG 
Views:	19 
Size:	2.19 MB 
ID:	191286
    Last edited by bigdaddyvw185; 04-14-2014 at 10:35 PM.

  2. #182
    Join Date
    Sep 2013
    Location
    California
    --
    85
    Nice! good stuff brotha..looks like I'll be making a trip to autozone here soon..you gotta be gettin close..and why the heck would anyone grind the brake caliper like that??

  3. #183
    Join Date
    Nov 2013
    Location
    Oxford CT, New Haven County
    --
    983
    awesome!!! So whens it going to be up and running? lol...

  4. #184
    bigdaddyvw185's Avatar
    bigdaddyvw185 is offline At The Back Of The Pack Arm chair racerAt the back of the pack
    Join Date
    Mar 2013
    Location
    Seymour CT
    --
    314
    your guess is as good as mine Justin lol, only thing that i could think of is for using some different set of brake pads
    And Craig sOoOoOon lol. My front brake caliper parts will be in any day so once they come in that will be all set. I am waiting on some bushings for the swing arm / torque link that attaches to the brake caliper / swing arm then once they are done the rear caliper is going on and i can finally torque down the rear end / axle and install the chain.

  5. #185
    bigdaddyvw185's Avatar
    bigdaddyvw185 is offline At The Back Of The Pack Arm chair racerAt the back of the pack
    Join Date
    Mar 2013
    Location
    Seymour CT
    --
    314
    So i got my rear brakes and axle all squared away last night! I ran into a small problem last week while installing the rear brakes. I am using a boss bearing carrier from ebay and since it is not the OEM carrier it was not allowing the brake rotor hub to be installed in the correct position on the axle. I ended up having to use 1/4" shims between the caliper and mounting bracket. But when i did this the problem was still there for the fact that since the brake rotor hub was not in far enough on the axle the 2 axle nuts could not be tightend properly.... So i decided to have a local machine shop turn down 1/4" on the inner side of the brake rotor hub and chamfer a new area for a O ring, Needless to say this solved all the problems that i was dealing with and everything bolted up perfect!

    So as an FYI for any of you guys planning on buying a boss bearing carrier off ebay the inner side of the brake rotor will need to be trimmed down a tad bit. But it does work nicely once it is trimmed, I spoke with a member over on foolers.com and was he informed me that he also had to do the same thing and was glad to hear that he was not the only one who ran into this minor problem lol.

    but anyways The rear end has been squared away along with the brakes, just need to set the chain tension and tighten up the carrier bolts after the chain tension is set. So last night while burning the midnight oil along with a buddy of mine we decided to sit the fenders / gas tank / seat on it for the first time while having it sit as a roller. To decide on what we are going to do for the color scheme of the rear fenders for the new set i will be ordering in the near future we came up with a couple different ideas that i think will be pretty awesome!.
    Here are some pics of how it sat last night.
    Click image for larger version. 

Name:	059.JPG 
Views:	37 
Size:	2.70 MB 
ID:	193043Click image for larger version. 

Name:	060.JPG 
Views:	16 
Size:	2.72 MB 
ID:	193044Click image for larger version. 

Name:	061.JPG 
Views:	18 
Size:	2.67 MB 
ID:	193045

  6. #186
    Join Date
    Oct 2013
    Location
    Wherever I May Roam
    --
    3,757
    DAAAAAAAMN!!!!! I bet youre gettin excited!!

    Looks GREAT bro, and good stuff on the brake hub mod. This thread is about as informative as it gets on the 2nd gen R's in my opinion, know lots more about them now, thanks Chris.


  7. #187
    Join Date
    Sep 2013
    Location
    California
    --
    85
    ^^^^I gotta second that...I'm biased of course but this is easily one of my favorite build threads..lookin good buddy..it's soo close!!!!!

  8. #188
    Join Date
    Apr 2010
    Location
    Indian Falls, NY
    --
    1,289
    Looking seriously wicked dude. Love it.

  9. #189
    Join Date
    Oct 2003
    Location
    STL
    --
    3,561
    dude its soooo close! you have been wrenching on this way to long, finish it and go for a damn ride already! looking real good
    TrikeFest 07,08,09,10,11,12,13,14 SandPuppie's Ride 07,08,09 Imperial Invasion 09, 13

  10. #190
    bigdaddyvw185's Avatar
    bigdaddyvw185 is offline At The Back Of The Pack Arm chair racerAt the back of the pack
    Join Date
    Mar 2013
    Location
    Seymour CT
    --
    314
    Quote Originally Posted by JasonB View Post
    dude its soooo close! you have been wrenching on this way to long, finish it and go for a damn ride already! looking real good
    I was actually looking threw my pictures from when i first got it and I bought it April 4 2013, So just over a year now, you have been watching from the start.. At least throw me a bone for the fact that it was in Really rough shape when i got it lol.... its Almost done. I still have the tuning process on my mind but have been doing my homework Jason lol. Plus now that i am working at this motorcycle shop i have already gotten the OK to bring it in to the shop and the techs / owner will help me out with the tuning process. They want me to bring it into work and put it outside in the line of bikes in front of the store for a couple days to show it off lol since we are one of the few shops in my area that will actually even take in a 3 wheeler for service I was like yea we can work that out.

  11. #191
    Join Date
    Nov 2013
    Location
    Oxford CT, New Haven County
    --
    983
    Quote Originally Posted by bigdaddyvw185 View Post
    Plus now that i am working at this motorcycle shop i have already gotten the OK to bring it in to the shop and the techs / owner will help me out with the tuning process. They want me to bring it into work and put it outside in the line of bikes in front of the store for a couple days to show it off lol since we are one of the few shops in my area that will actually even take in a 3 wheeler for service I was like yea we can work that out.
    lol Im gonna wait till you go for lunch then im gonna go bug him by asking if its for sale and how much then im gonna offer some huge amount of $$ for it, then im gonna tell him ill only buy it if he'll change the tires! lol, lol, lol... Did you get the new "Goodies" on it yet? I gotta start like, showing up at your work with a lawn chair and be like them old guys who hang around garages and just break stones and talk s**t all day...lol, lol, lol... well, until they toss me out of there.

    Seriously though, if you put your trikes out-front, Im sure there will be tons of people stopping to look at it.
    Are those bikes all for sale?

  12. #192
    Join Date
    Nov 2013
    Location
    Oxford CT, New Haven County
    --
    983
    oh yeah... I found this and thought of you.. lol http://www.ebay.com/itm/1981-1982-HO...eb9b62&vxp=mtr

    and theres a guy on Craigs list who is trying to trade off 2 250R's turned to quads... lol

  13. #193
    Join Date
    Nov 2013
    Location
    Oxford CT, New Haven County
    --
    983
    Quote Originally Posted by czac View Post
    oh yeah... I found this and thought of you.. lol http://www.ebay.com/itm/1981-1982-HO...eb9b62&vxp=mtr

    and theres a guy on Craigs list who is trying to trade off 2 250R's turned to quads... lol
    Im almost wishing it would fit the YTM...lol

  14. #194
    bigdaddyvw185's Avatar
    bigdaddyvw185 is offline At The Back Of The Pack Arm chair racerAt the back of the pack
    Join Date
    Mar 2013
    Location
    Seymour CT
    --
    314
    So today i got the PRM skid plate installed and started mocking up the bills exhaust along with my DG tip. It looked like it was going to work nicely off of the trike but when installed the angles are slightly different. I have to bend the DG tip about 15-20 degrees out towards the outside of the trike. I really dont want to bend up this DG tip tho since i still have my DG expansion chamber and it fits great with that pipe.... I am going to check out Ebay and see if their are any listed for a decent price, If anyone has a silencer available please by all means give me a shout.

    Also does anyone happen to have a 2nd gen exhaust gasket that goes inside the expansion chamber??????? I fab'd up my own out of an espesdus gasket i found at work but i feel that with it i am not going to be able to get the expansion chamber fully seated onto the exhaust flange because it is 2 times the width of the stock OEM gasket and takes up the whole rim of the exhaust flanger versus the OEM that takes up only half.
    Click image for larger version. 

Name:	005.JPG 
Views:	16 
Size:	2.65 MB 
ID:	193093Click image for larger version. 

Name:	006.jpg 
Views:	17 
Size:	1.06 MB 
ID:	193094Click image for larger version. 

Name:	007.JPG 
Views:	21 
Size:	2.94 MB 
ID:	193095Click image for larger version. 

Name:	001.JPG 
Views:	13 
Size:	2.37 MB 
ID:	193096
    Last edited by bigdaddyvw185; 05-12-2014 at 07:20 PM.

  15. #195
    bigdaddyvw185's Avatar
    bigdaddyvw185 is offline At The Back Of The Pack Arm chair racerAt the back of the pack
    Join Date
    Mar 2013
    Location
    Seymour CT
    --
    314
    Here is a pic of the gasket i fab'd up, then a pic of the OEM gasket that i was able to get from a buddy on the forums for mockup / comparison to while trying to find something that will work.
    Click image for larger version. 

Name:	021.JPG 
Views:	7 
Size:	1.97 MB 
ID:	193097Click image for larger version. 

Name:	020.JPG 
Views:	6 
Size:	2.14 MB 
ID:	193098

//ArrowChat Integreation Code //