//ArrowChat Code
Page 1 of 11 1 2 3 ... LastLast
Results 1 to 15 of 161

Thread: 250SX Timing Chain

  1. #1
    GSUwhiskers's Avatar
    GSUwhiskers is offline At The Back Of The Pack Arm chair racerFirst time rider
    Join Date
    May 2014
    Location
    Georgia
    --
    168

    250SX Timing Chain

    As I posted before my 250SX has a timing chain about to sling off. I have a guy who can "patch" it buti was wondering how hard it really is. I can get the parts on eBay for cheap although used. Or I could shell out the cash for new parts but the labor would be on me. Has anyone attempted this? Give me your honest opinion.

  2. #2
    Join Date
    Sep 2010
    Location
    NEPA
    --
    7,048
    There is ONE way to fix a timing chain. By replacing it with a brand new one. You will also want to inspect the plastic guides also. Your bike will run quiet and amazing when done.
    Please help those who cannot help themselves.

    ALWAYS buying Museum quality machines,3 and 4 wheels. And any and ALL ,NOS parts,EVERY brand.

    I am turning my PM's Off,my Email is billsracing@hotmail.com,put 3WW in the subject. Thanx!

    Gun laws do not stop criminals. BULLETS do.

  3. #3
    Join Date
    Jan 2011
    Location
    Choctaw, OK
    --
    2,755
    Totally agree with 007. Don't skimp on the timing chain. Its too important.

  4. #4
    GSUwhiskers's Avatar
    GSUwhiskers is offline At The Back Of The Pack Arm chair racerFirst time rider
    Join Date
    May 2014
    Location
    Georgia
    --
    168
    Ten four well then that's what I will do. She will be down for some time while I work on it but hopefully she will have a renewed life afterwards. Now, can anyone point me in the direction of a how to thread?

  5. #5
    Join Date
    Mar 2010
    Location
    Pacific NW
    --
    4,255
    Quote Originally Posted by GSUwhiskers View Post
    Ten four well then that's what I will do. She will be down for some time while I work on it but hopefully she will have a renewed life afterwards. Now, can anyone point me in the direction of a how to thread?
    Someone recently posted a full set of pictures. procedure and tools
    for sx timing chain replacement.
    I've got to go to work or I'd look for it for you.
    Maybe 2-3 weeks ago?
    and yes, they sound so sweet when they run right.
    I personally enjoy hearing a few sitting and idling.
    Reminds me of 5 part eagles harmony.

    Wish, also, that someone would take a timing chain tensioner measurement or service limit specs, altho chain noise is usually unmistakable.
    You'll be so glad you did it right and it will last another 25 years or more.

  6. #6
    GSUwhiskers's Avatar
    GSUwhiskers is offline At The Back Of The Pack Arm chair racerFirst time rider
    Join Date
    May 2014
    Location
    Georgia
    --
    168
    I found the thread and have been looking into it. I'm pretty sure I can do it myself. You put the chain on, then is there any kind of timing synchronizing procedure? Or does the chain just take care of itself? How long do you think it would take for a novice to do this job?

  7. #7
    Join Date
    Sep 2010
    Location
    NEPA
    --
    7,048
    Yes, you will have to time your cam to crank. Cam timing... Will also have to adjust your valves when done. You can do it ,but find a manual on here ,and go through it first to understand. If you get this wrong,you will bend a valve,and if out of time bad enough. Scurf up your piston.
    Please help those who cannot help themselves.

    ALWAYS buying Museum quality machines,3 and 4 wheels. And any and ALL ,NOS parts,EVERY brand.

    I am turning my PM's Off,my Email is billsracing@hotmail.com,put 3WW in the subject. Thanx!

    Gun laws do not stop criminals. BULLETS do.

  8. #8
    Join Date
    Feb 2011
    Location
    Sarnia, Ontario, Canada
    --
    3,415
    I think site op should consider a new forum section..call it the 'techs corner' or something like that.

    All these great info threads that some members are taking time to post can have a permanent reference location.

    I nominate Jim's(FlyingW) carb and rear diff threads for starts!!
    Current toys..
    1986 Honda 350X..trail bomb!
    1985 Honda 250SX..my main mudder
    1985 Honda 250ES..Back in Black Trike
    Current non-trike toys:
    1990 Honda TRX300FW
    1995 Seadoo GTX
    1998 Polaris Indy Lite 340(Nearly new looking)
    1998 Polaris Touring 500
    1998 Club Car (electric)

  9. #9
    Chopsaw is offline Just Too Addicted Arm chair racerJust too addicted
    Join Date
    May 2013
    Location
    St. Louis
    --
    505
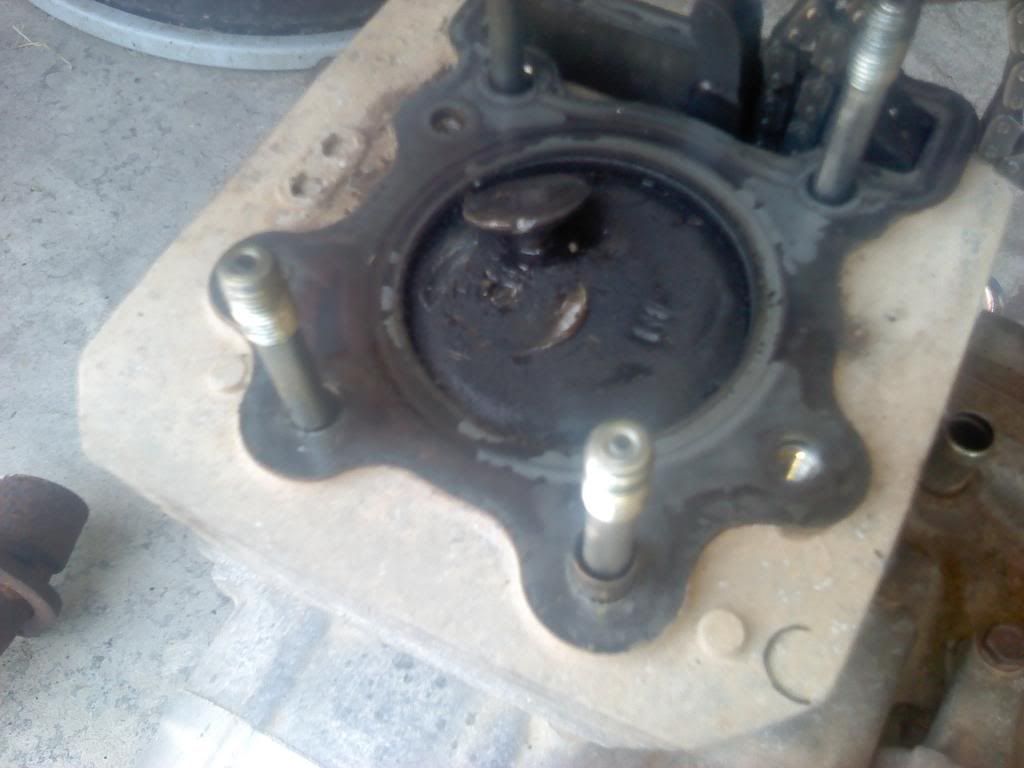
    I bought a non-running 85 es to get some parts off of it . I went ahead and tore the engine down , and here you see the results of a jumped timing chain .

  10. #10
    GSUwhiskers's Avatar
    GSUwhiskers is offline At The Back Of The Pack Arm chair racerFirst time rider
    Join Date
    May 2014
    Location
    Georgia
    --
    168
    Wow, so I'm probably just going to keep it parked until I can get the parts and fix her up. I really do appreciate all the help ya'll have given me. I picked up a manual off someone's previous post the other day and only have had time to scan the pages. I saw a bit about lining up an index mark and a "F" or "T" (I can't remember which) in the cam timing section of the manual. I'm assuming that is the cam timing? I have no clue how to adjust the valves, I've seen it done before, so is that covered in the manual? I need to find a sort of step by step of that part.
    Is that chain hard to get on once you get to it? I've never replaced a chain on anything, but it seems to me a metal one-piece chain would be quite hard to fit on a fixed position gear(s). Sorry for asking so many questions guys, like I've said before I don't have a covered place to work right now so I have to wait before I can even start this project, and I REALLY want to know every detail before I start.

    I also agree with the addition of a tech thread, and please allow new guys to post in it!!!!

  11. #11
    Chopsaw is offline Just Too Addicted Arm chair racerJust too addicted
    Join Date
    May 2013
    Location
    St. Louis
    --
    505
    Top dead center , valve timing , is basic in four stroke engines . If you are not sure , get some help . The valves open and close at the right time on intake , combustion and exhaust , that times with the stroke of the piston .

  12. #12
    Join Date
    Mar 2010
    Location
    Pacific NW
    --
    4,255
    The manual is gonna tell you.
    see if you can click on:
    service manual
    I'd say TDC on the crank and some (in)visible mark of notch on the cam
    wants to be lined up.
    Lest we not forget, on a 4 stroke, the crank goes around twice as many times as the cam so being 180 degrees out is not uncommon.
    You're in for a treat.
    Gonna sound like a sewing machine when yer done.

  13. #13
    GSUwhiskers's Avatar
    GSUwhiskers is offline At The Back Of The Pack Arm chair racerFirst time rider
    Join Date
    May 2014
    Location
    Georgia
    --
    168
    Alright boys, I've continued my research on this chain. I read through the post that was referenced before and there are a couple questions I have. One is he took off the head, but I don't see why that is necessary? Secondly even after looking through the manual extensively, there is not a section about replacing the chain itself. I understand how to get to the chain, BUT I would like clarification on how you put the chain back on? I know the flywheel has to be lined up with the with the alternator cover, and the cam sprocket has two index marks that need to be level with the surface of the head. Okay so, this is a two part question really and I am asking for a baby-step micro breakdown kind of answer. First off do you align the flywheel, then put the chain on the crankshaft, then thread the chain into the head and put the chain on the sprocket, then put the sprocket and camshaft back in the head? OR does it matter what order you start in?
    NOW the SECOND question, how do you align these two marks (the flywheel and the cam sprocket) perfectly when you're working with a one piece chain?

  14. #14
    Join Date
    Jan 2011
    Location
    Choctaw, OK
    --
    2,755
    Really pretty easy.

    Align the crank so the mark aligns with the mark on the small inspection hole in the stator cover
    CAM lobes DOWN
    Chain is installed on the CAM sprocket and the two hash marks on the back of the CAM sprocket parallel the head.

    That's the tree things you need to ensure are true. This is done with the CAM chain tensioner removed. If you look at the CAM chain sprocket, you will see the center hole is not round. Its notched so you can drop the sprocket down leaving enough slack in the chain to roll the chain over the teeth one tooth at a time to get the sprocket in its correct position to be placed back on the cam. Basically you will align the crank, bring the chain up in to the head, place the chain over the CAM sprocket with the notches in the sprocket up and down, insert the CAM through the sprocket and lay it in the journals, place the rubber cap on the end of the CAM, roll the CAM sprocket around so the marks are in the right position, and place the CAM sprocket back on the CAM. This part can be a little frustrating with a new chain. Be sure your mark in the stator cover remains in the right position. After you get the CAM sprocket back on, the sprocket bolt holes should line up but always check your alignment on all three areas before tightening up the sprocket bolts.

  15. #15
    Join Date
    Jan 2011
    Location
    Choctaw, OK
    --
    2,755
    ALWAYS ALWAYS ALWAYS torque the bolts on the rocker cover. The book gives you the torque values. Over tightening the rocker cover can put too much pressure on the CAM journals and pinch the CAM. Apply a good bead of sealant around the mating surface of the head and feather the sealant out with a small brush. Let the squeeze out cure before cleaning it off otherwise that stuff will be everywhere.

//ArrowChat Integreation Code //