//ArrowChat Code
Page 1 of 2 1 2 LastLast
Results 1 to 15 of 16

Thread: Trike Chopper

  1. #1
    Join Date
    Jun 2016
    Location
    Silverdale, WA
    --
    36

    Trike Chopper

    So...not like a three wheeled chopper.....like, I took my latest trike and am chopping it up! Making a KLT200 "boonie bike". Glad to be part of another gathering of nuts on the internet!

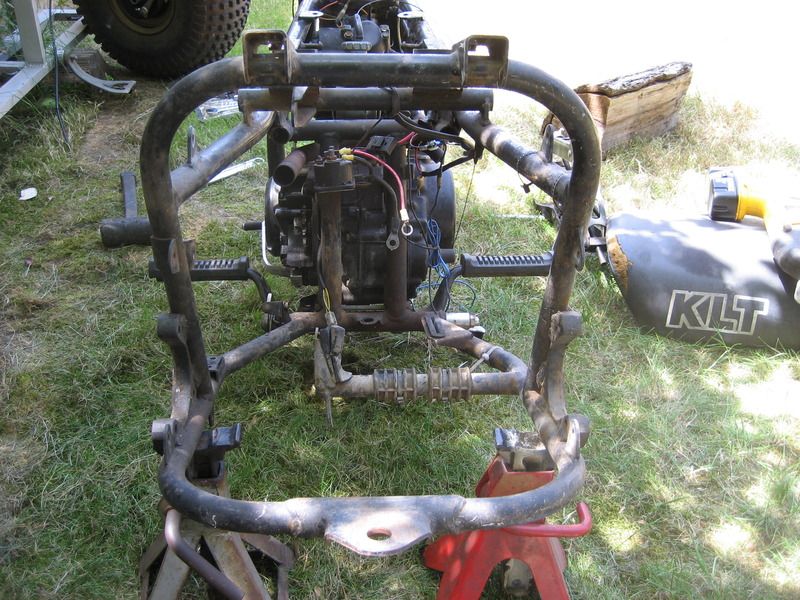
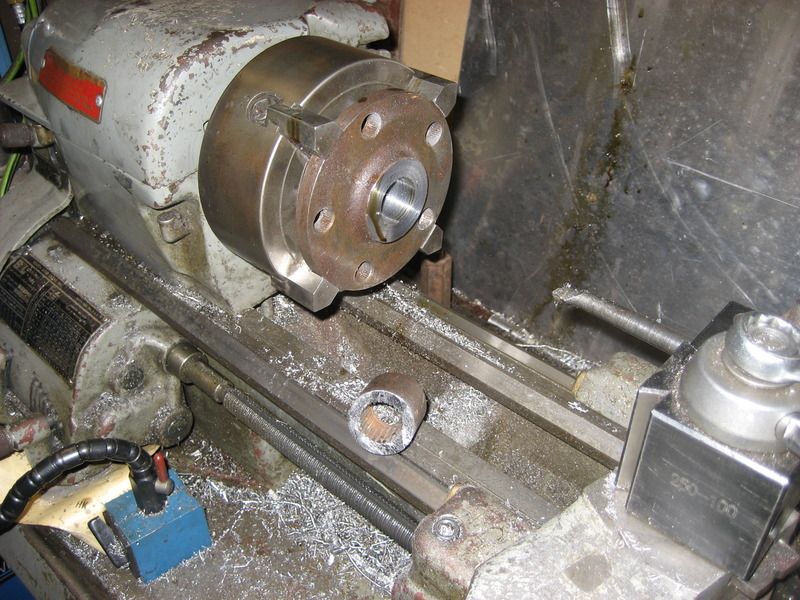
    I'll start a build post as soon as I can post up a new thread, but here's a teaser shot:

    Click image for larger version. 

Name:	IMG_2942.jpg 
Views:	124 
Size:	970.7 KB 
ID:	232707

    What's the best place here to post up build posts like this? I wasn't sure if in the general Trikesylvania or the Mad Scientist Lair sub forum.
    Last edited by yellowoctupus; 06-13-2016 at 01:20 AM.
    Just some more hacked up three wheelers...

    KLT200 "Boonie Bike" Build post: Kawasaki Boonie Bike

    200X "Boonie Bike II" Build post: 200X Boonie Bike

    Phil

  2. #2
    Join Date
    Jun 2016
    Location
    Silverdale, WA
    --
    36
    Lots of rear end shots, measurements etc:


    Rear end mounting 'pads'


    I gutted the original rear end, and am going to cut the tubes down to the appropriate width, weld some washers on the tubes and mount my 2nd 'front' end there.


    So the EK50.. chain I had was actually 520.... oh well. So the 50 series sprockets I ordered were way too wide (3/8 instead of 1/4). Luckily they're not hardened, so they turned fine. They should be roughly .020-.030 under the chain width. (see the following pictures for dimensions). Additionally, they need a lead in angle cut on them, it looked like 12° was pretty close. Somewhere between 10-15 I'm sure would be fine.


    Cutting the keyway for the shaft, should have cut the keyway deeper, I did .125, apparently the shaft keyway should be 0.142....so the key is a little tight fitting. Oh well. Maybe I'll recut it, to get a little more engagement as I'm using an aluminum shaft...


    Some old random wheel hub we made at work, PRE hardening of the splines. I cut it with a hacksaw , and then I'm boring it out to fit on the new 'front' hub bearing tube. I'll weld it on, and clearance it so I can still get the wheel on and off if need be.

    Just some more hacked up three wheelers...

    KLT200 "Boonie Bike" Build post: Kawasaki Boonie Bike

    200X "Boonie Bike II" Build post: 200X Boonie Bike

    Phil

  3. #3
    Join Date
    Jun 2016
    Location
    Silverdale, WA
    --
    36
    I'll have to go take some new pictures, but the bike's all done! I had to fix the following things that drove me crazy figuring out:

    Bad Condenser
    Bad Coil
    Completely incorrect pilot jet (#100 instead of #35!!)
    Flipped timing advance unit (fires 180° off....)
    Faulty vacuum fuel pump

    etc.

    What a mess.

    It fires right up now, has front and rear lights with a brake light too! The battery on it's way out, so hopefully the kick starter I just ordered (YES! I found one!) will keep me from getting stuck in the woods somewhere. Bump starting this monstrosity is not convenient. At all.

    Two issues still to solve at some point:

    1. Steering is wonky. I'm guessing it's too steep of a head angle, but I'll have to look into that later. I'm not looking forward to repositioning the head tube right now, so I'll probably just ride it as is for now.

    2. Gas tank needs some sort of vent. I think the the stock, under tank vent was literally just a tube that ran from a small nipple on the top of the tank to .... the airbox maybe?? So, i need to build some sort of vent mechanism into my Blitz jerry can screw top cap. Any ideas?
    Just some more hacked up three wheelers...

    KLT200 "Boonie Bike" Build post: Kawasaki Boonie Bike

    200X "Boonie Bike II" Build post: 200X Boonie Bike

    Phil

  4. #4
    Join Date
    Jun 2016
    Location
    Silverdale, WA
    --
    36

    Boonie Bike Progress Pictures

    Rear axle/ hub assembly.
    Click image for larger version. 

Name:	IMG_3053.jpg 
Views:	93 
Size:	852.3 KB 
ID:	233390

    Yes that's an actual can of GOLD wheel paint. C'mon. This thing is legit.
    Click image for larger version. 

Name:	IMG_3054.JPG 
Views:	90 
Size:	2.53 MB 
ID:	233391

    Click image for larger version. 

Name:	IMG_3056.JPG 
Views:	87 
Size:	2.88 MB 
ID:	233392

    Click image for larger version. 

Name:	IMG_3059.jpg 
Views:	131 
Size:	1,006.4 KB 
ID:	233393

    Brake 'stop'.
    Click image for larger version. 

Name:	IMG_3062.jpg 
Views:	100 
Size:	866.5 KB 
ID:	233394

    Welding on patch plates on the exhaust.... It's got a bad case of rot.
    Click image for larger version. 

Name:	IMG_7060.jpg 
Views:	109 
Size:	680.4 KB 
ID:	233395

    Battery tray...smokin'
    Click image for larger version. 

Name:	IMG_7066.JPG 
Views:	100 
Size:	2.90 MB 
ID:	233396

    My father is amused by me welding on gas tanks all the time. What's the big deal?
    Click image for larger version. 

Name:	IMG_7069.jpg 
Views:	110 
Size:	832.5 KB 
ID:	233397
    Just some more hacked up three wheelers...

    KLT200 "Boonie Bike" Build post: Kawasaki Boonie Bike

    200X "Boonie Bike II" Build post: 200X Boonie Bike

    Phil

  5. #5
    Join Date
    Jun 2016
    Location
    Silverdale, WA
    --
    36
    It's rideable! Little tweaks here and there will be surely necessary, but it's together at least!

    Oh, and the kickstart you see on the parts diagrams for the KLT200 is seriously exactly what you see in the pictures. I figured it was an unfinished illustration that accidentally got released as is. Nope. It's actually an emergency - dead battery - kick start lever that has to be slid off the splines after it's fired up. I found an NOS kicker online, bought it and was surprised $40 later. Oh well, my fault. I modified it to work with some streetbike kick start lever I had in a box of parts, and it came out looking like a factory part. Almost. At least it's a clean modification. Not sure why Kawasaki didn't come out with a legit kick start option.

    KLT200 Kick Start Parts Diagram

    I also have both lights wired up, including a brake light (I had ALL sorts of weird odds and ends to build from for this bike).

    Click image for larger version. 

Name:	IMG_7246s.jpg 
Views:	120 
Size:	493.5 KB 
ID:	233469
    Just some more hacked up three wheelers...

    KLT200 "Boonie Bike" Build post: Kawasaki Boonie Bike

    200X "Boonie Bike II" Build post: 200X Boonie Bike

    Phil

  6. #6
    Join Date
    May 2010
    Location
    Wichita, Kansas
    --
    1,359
    Awesome! How does it ride? I love my KLT 200c. The 200c has a rear differential that can be locked and unlocked.

    What year KLT was it? I know many of them have CDI and everything for that set up. Those ones do require a battery.

    The KLT is based off the KZ200. From what I've seen, a lot of the KZ400 parts are similar to the klt and the kz200.
    I just wanna go fast. If your not first, your last!!
    Reproducing the Tecate CDI. Contact me if you need one. I'm most accessible on FaceBook. You can find me on the 1984-1987 Kawasaki Tecate KXT250 Group.

  7. #7
    Join Date
    May 2010
    Location
    Wichita, Kansas
    --
    1,359
    As to where the post goes, typically Trikesylvania. But in this case, I think it deserves the mad scientist lair!
    I just wanna go fast. If your not first, your last!!
    Reproducing the Tecate CDI. Contact me if you need one. I'm most accessible on FaceBook. You can find me on the 1984-1987 Kawasaki Tecate KXT250 Group.

  8. #8
    Join Date
    Jun 2016
    Location
    Silverdale, WA
    --
    36

    Kawasaki KLT200 Replacement PNs

    Hey, thanks! Not sure if it should be moved, but I'll let admins make the call. A 'Missle' specific sub forum would be sweet, IMO.

    Mine is an 81 (KLT200A1), so it's a points system. Additionally, it's a DC coil style, so the battery is required unless I wanted to do some serious screwing around to figure out how to use an AC coil, but then I'd have no lights, as I think I'd have to ground one side of the stator coil to make it work. Not worth it in my book. Even though my battery went quickly dead after buying the bike, now that I have a kickstarter, it fires right up and has good lights, so I'm happy. CDIs are nice for their lack of maintenance, but points systems are pretty fool proof to get running- backyard mechanic style.

    BTW, since the Kawasaki coil is a ONE YEAR part number, it's long out of stock anywhere, but the Honda CL450 coil from EMGO fits perfectly (PN - 24-37812 - Honda Twins CB/CL Style $27 Dennis Kirk). You just have to put on your own spark plug boot. I had an NGK style phenolic one laying around so no cost for me there (~$2.50 at Dennis Kirk). These are cool, didn't even know they made flashing boots: Flashing Spark Plug Boots

    Additionally, I used the BWD PN-G126 ($5 any auto parts store) condenser that's on almost every American made (points ignition) car from the 60s through the 90's. Although I mounted mine inside the points/cam cover, it did require removing one of the casting ribs on the inside of the cover to get it to fit.
    Just some more hacked up three wheelers...

    KLT200 "Boonie Bike" Build post: Kawasaki Boonie Bike

    200X "Boonie Bike II" Build post: 200X Boonie Bike

    Phil

  9. #9
    Join Date
    Jun 2016
    Location
    Silverdale, WA
    --
    36
    Oh, and to answer how it rides, simply: Weird. Fun, but weird. I think I have to play with the air pressure in the tires. When I'm 'sidehilling' the bike, it pulls around weird, as it does when you're initiating a turn on hard ground (ie, pavement). It's like the tire's so wide and pliable, that the knobs are fighting each other to turn sharp and to turn gradually at the same time. Worse come to worse I can put a narrower tire up front, but I already have these Goodyears which are in mint-o shape, so I'd rather figure out how to make them work better.
    Just some more hacked up three wheelers...

    KLT200 "Boonie Bike" Build post: Kawasaki Boonie Bike

    200X "Boonie Bike II" Build post: 200X Boonie Bike

    Phil

  10. #10
    Join Date
    May 2010
    Location
    Wichita, Kansas
    --
    1,359
    I need one of those spark plug boots.

    The 200c does have a suspended front end. Looking at it, it's odd. ...Almost like Kawasaki just rigged something up and got rid of it! lol

    Click image for larger version. 

Name:	listing_pic_299518_1331679632.jpeg 
Views:	83 
Size:	33.3 KB 
ID:	233510Click image for larger version. 

Name:	listing_pic_299518_1331679585.jpeg 
Views:	88 
Size:	47.3 KB 
ID:	233511


    I want to challenge you to take a machine and give it 3 wheel steering. Or a bike with 2 wheel steering. LOL
    I just wanna go fast. If your not first, your last!!
    Reproducing the Tecate CDI. Contact me if you need one. I'm most accessible on FaceBook. You can find me on the 1984-1987 Kawasaki Tecate KXT250 Group.

  11. #11
    Join Date
    Oct 2013
    Location
    Wherever I May Roam
    --
    3,757
    It's not odd it's called a leading link and it's quite common amongst European bikes. It works great.

  12. #12
    Join Date
    May 2010
    Location
    Wichita, Kansas
    --
    1,359
    I agree, it does work pretty good. Glad to know what it's called.

    I'll still call it odd.
    I just wanna go fast. If your not first, your last!!
    Reproducing the Tecate CDI. Contact me if you need one. I'm most accessible on FaceBook. You can find me on the 1984-1987 Kawasaki Tecate KXT250 Group.

  13. #13
    Join Date
    Jun 2016
    Location
    Silverdale, WA
    --
    36
    I was actually thinking if I could come up with one of the leading link forks and run more air pressure up front it would help the handling.

    My favorite fork probably is the Honda that's part way down the page: Leading Link Forks
    Just some more hacked up three wheelers...

    KLT200 "Boonie Bike" Build post: Kawasaki Boonie Bike

    200X "Boonie Bike II" Build post: 200X Boonie Bike

    Phil

  14. #14
    Join Date
    Jun 2016
    Location
    Silverdale, WA
    --
    36
    Or a bike with 2 wheel steering. LOL
    I've ridden a bicycle like that, it's very difficult to ride in a straight line. The caster effects are pretty weird to handle. The idea was that you'd be able to 'track' the front and rear wheels together for...traction or something? it was also a two wheel drive bike. Engineering senior projects can get a little...abstract....
    Just some more hacked up three wheelers...

    KLT200 "Boonie Bike" Build post: Kawasaki Boonie Bike

    200X "Boonie Bike II" Build post: 200X Boonie Bike

    Phil

  15. #15
    Join Date
    Jun 2016
    Location
    Silverdale, WA
    --
    36
    So, although it was not a direct bolt on fit, it was pretty close. I had to drill out the hub for four studs (Yamaha used 3 on a small pattern) and lengthen the steerer tube (almost an inch, but I didn't record the measurement).

    '84 225DX Freebie frame+hub.

    FYI, Front wheel bearings are 6203 (qty2), Seals are 23 40 7 (qty2).

    It rides SO much better now. Yes, obviously suspension will make the ride better, but it rides much better because it slackened out the head tube angle, and when I flipped the axle forward (it was a trailing axle design on the 3-wheeler) it gave it significantly better steering geometry. Granted, it's still an overgrown minibike with 11" wide tires, so it's not a 'corner carver' but it's still a step in the right direction.

    Click image for larger version. 

Name:	IMG_9819.jpg 
Views:	151 
Size:	2.27 MB 
ID:	235121
    Just some more hacked up three wheelers...

    KLT200 "Boonie Bike" Build post: Kawasaki Boonie Bike

    200X "Boonie Bike II" Build post: 200X Boonie Bike

    Phil

//ArrowChat Integreation Code //