that's So... gonna screw on the track.. that must be where all the good drag bikes go when they retire..


 Loves Corn.
Catch me if you can
Loves Corn.
Catch me if you can
that's So... gonna screw on the track.. that must be where all the good drag bikes go when they retire..
Always finding new and exciting ways to not give a hoot in hell
Catch me if you can
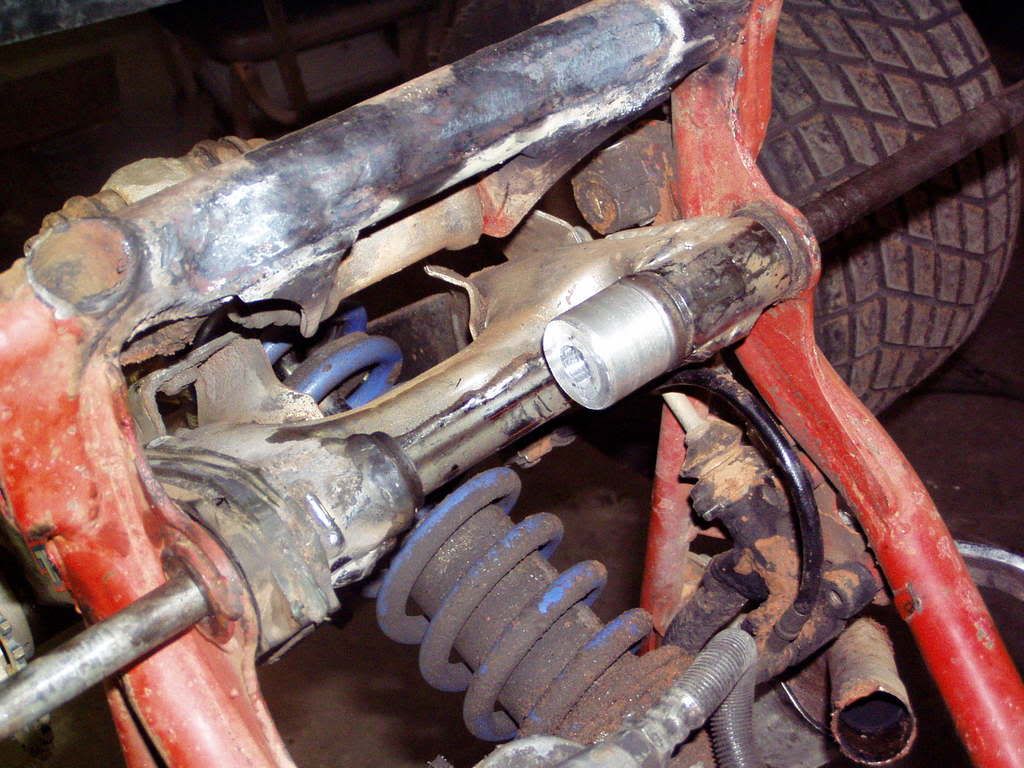
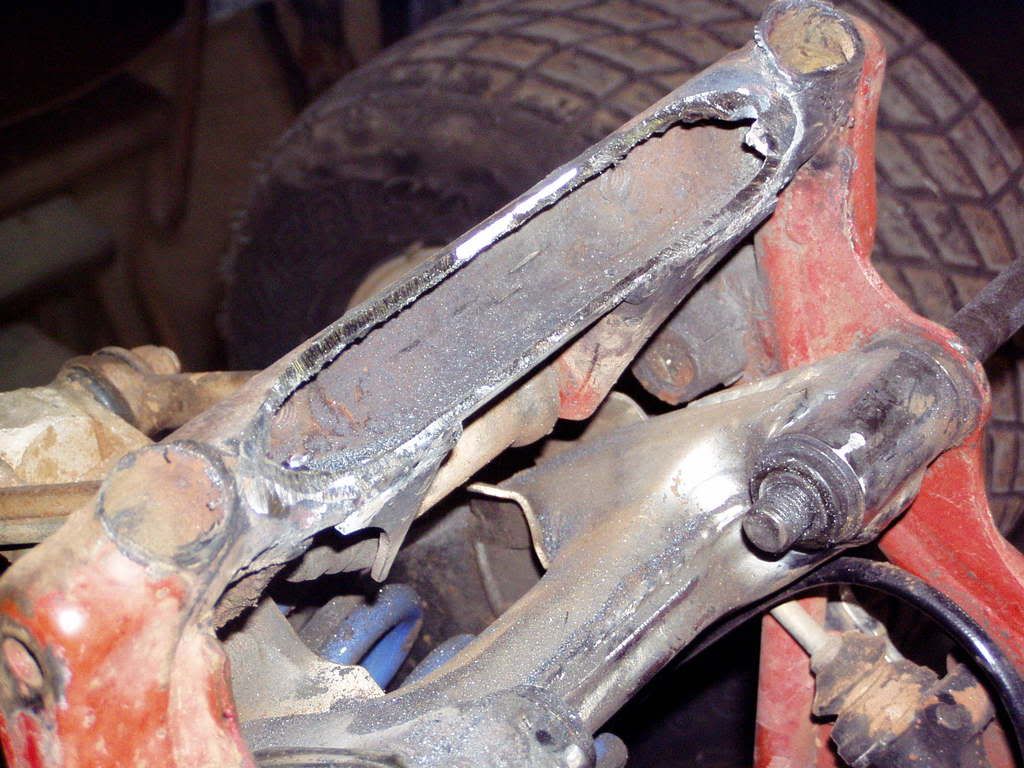
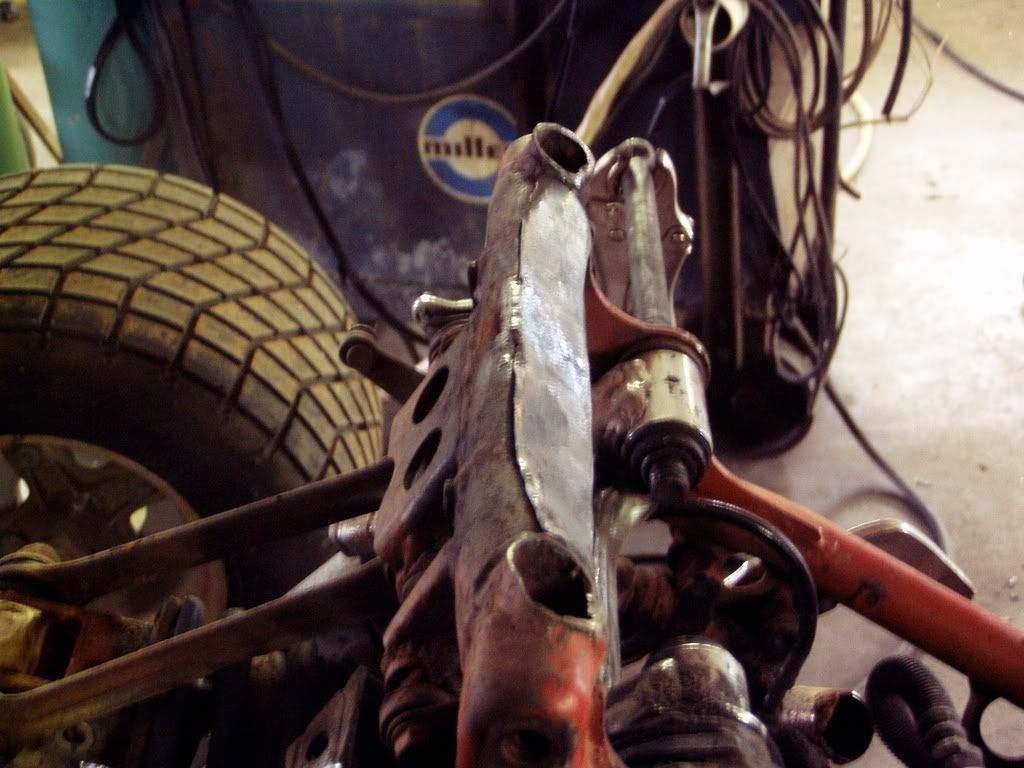
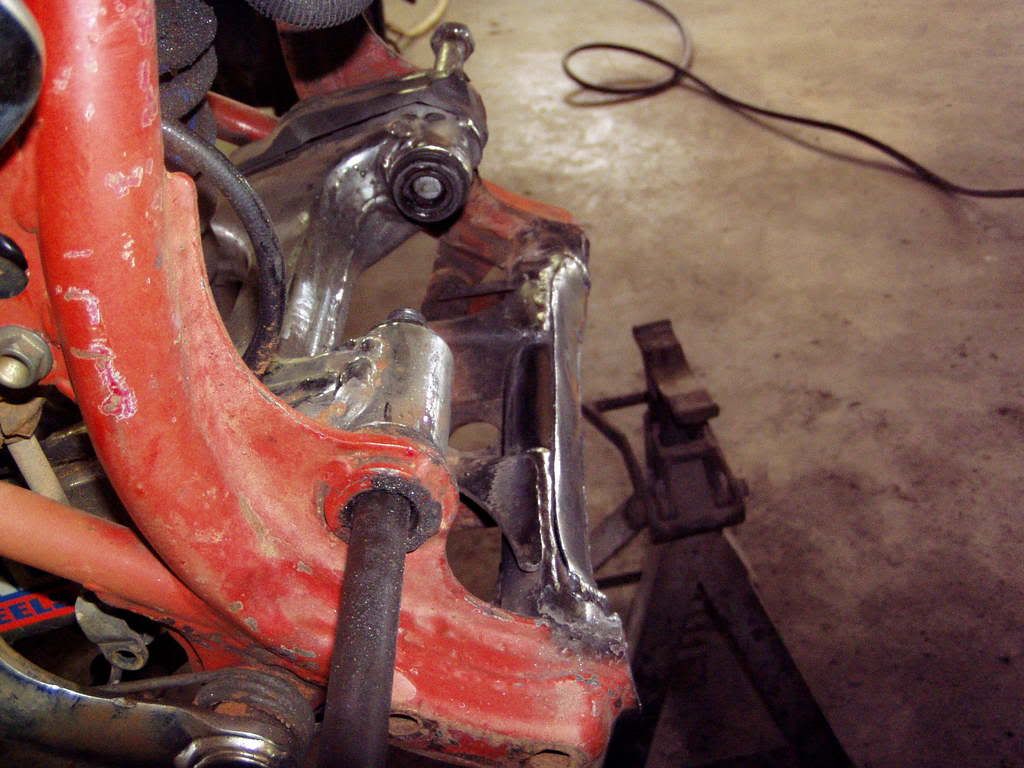
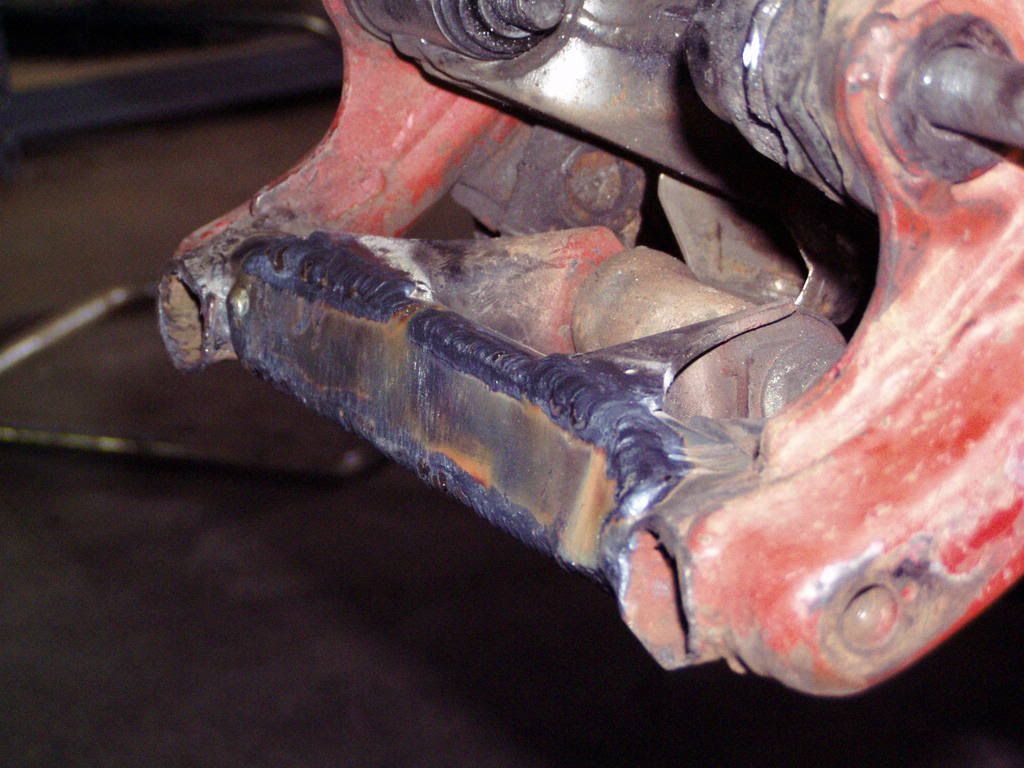
Temporary mushed in frame area, this will be ground out, and have a piece of flat sheet metal welded into place to make it more sightly and give me a little bit of extra room. You can also see, the bushing I've made for mock up, that will properly align the CR500 motor over to the left side of the frame where the chain and sprocket will ine up correctly. The width of the CR500 rear mount that the swingarm pivot mount goes through is roughly 74mm, and the distance between the middle of the swingarm on the 250R is about a 100mm with the bushing dust caps, so I needed about a 26mm spacer ( I cut it a little long, so that I can trim off of it if its to long).
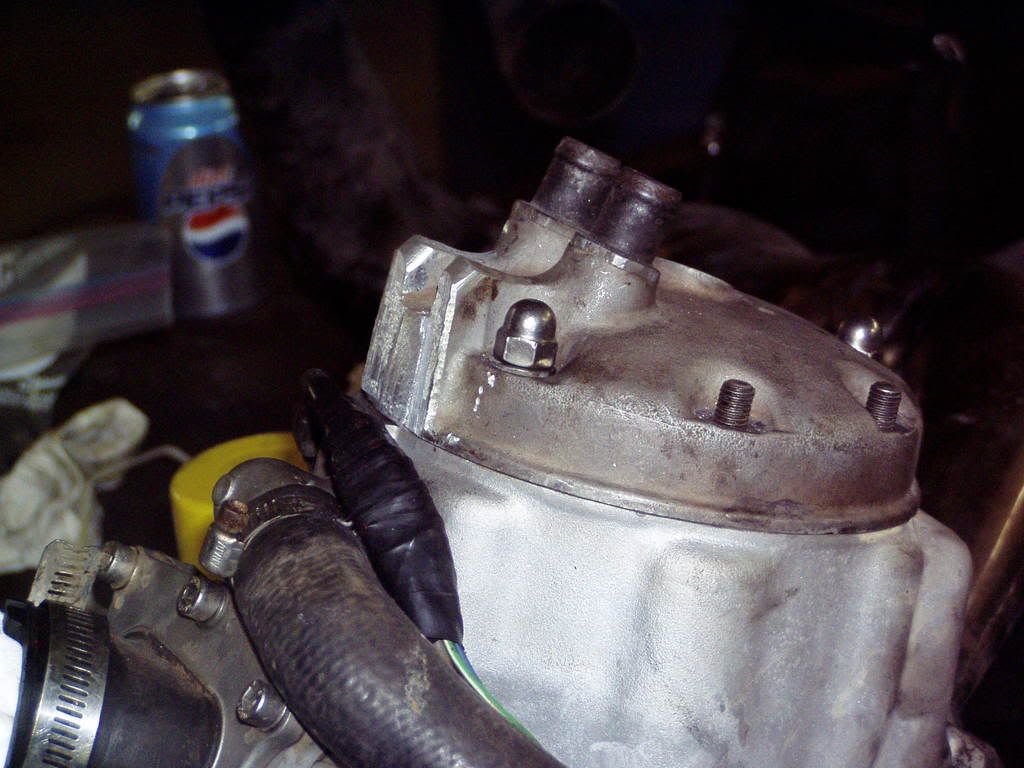
Next was head modification. Because of how close it was to the top of the frame it was necessary to remove the head stay mount to get it to fit. I don't think I'll be able to take the head off with the motor in the frame but it should fit without notching the frame or anything. I do not, at this time, plan on using the head stay mount. But, I might make a new one, shorter, and closer to the head in the future.
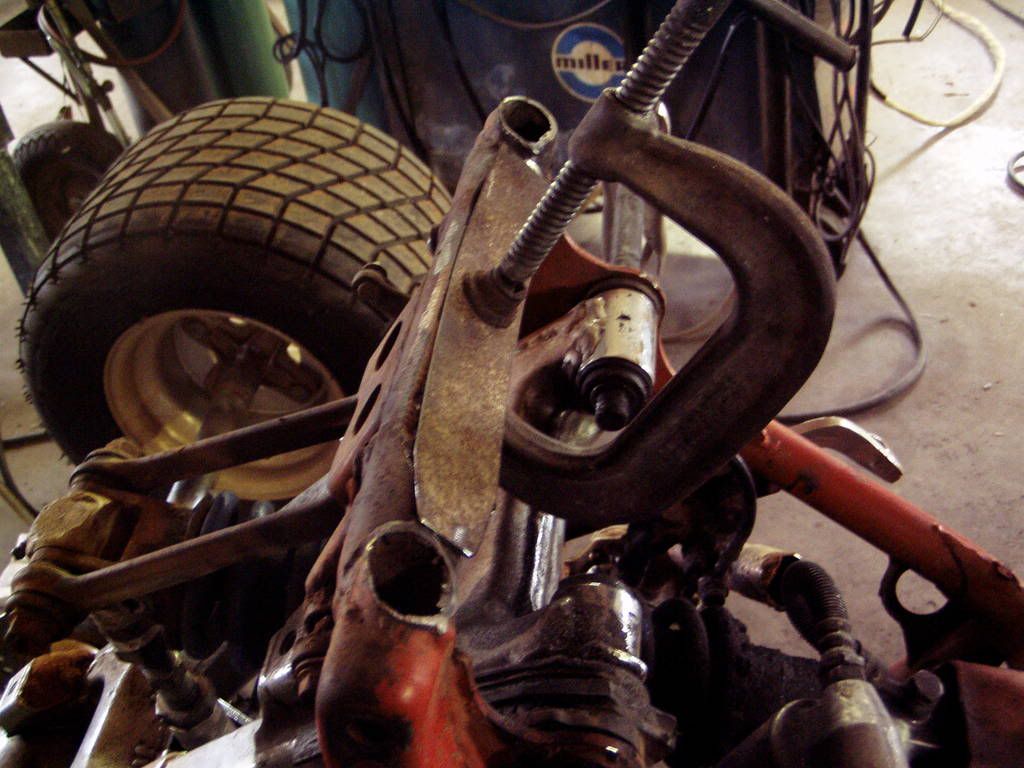
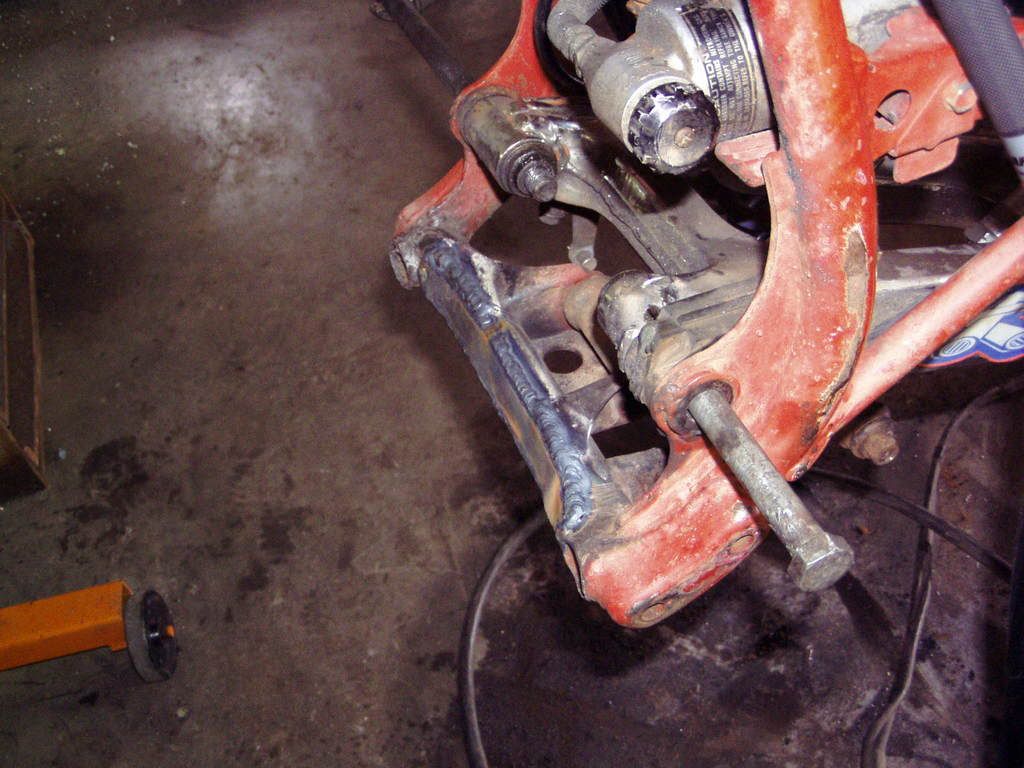
And then, here is, to me, the most important thing. And that is making sure the center of the sprocket shaft and the swingarm pivot bolt are on a perfectly straight and level plane. This was my first thing, making sure I could get it correct. This to me had to be done first, followed by chain alignment before anything else should be started. The pipe, radiators, kicker, other motor mounts, all the rest of that *Edited**Edited**Edited**Edited* can be adjusted and changed and made to work. This alignment between the sprocket shaft and the pivot join, plus the chain alignment are capitol. They can't be wrong, everything else is second to them.
So thats pretty much where I'm at now. I'm going to get the pivot area buttoned down next, and probably grind flat/weld that cross brace the linkage bracket is on before I move onto anything else. The bottom frame rails will pretty much be the last thing I do, because if I do need to move anything else around I don't want to already be locked into those. The pipe is going to be veeerrrrrrrrrrrrrry interesting, I know that.
Always finding new and exciting ways to not give a hoot in hell
Catch me if you can
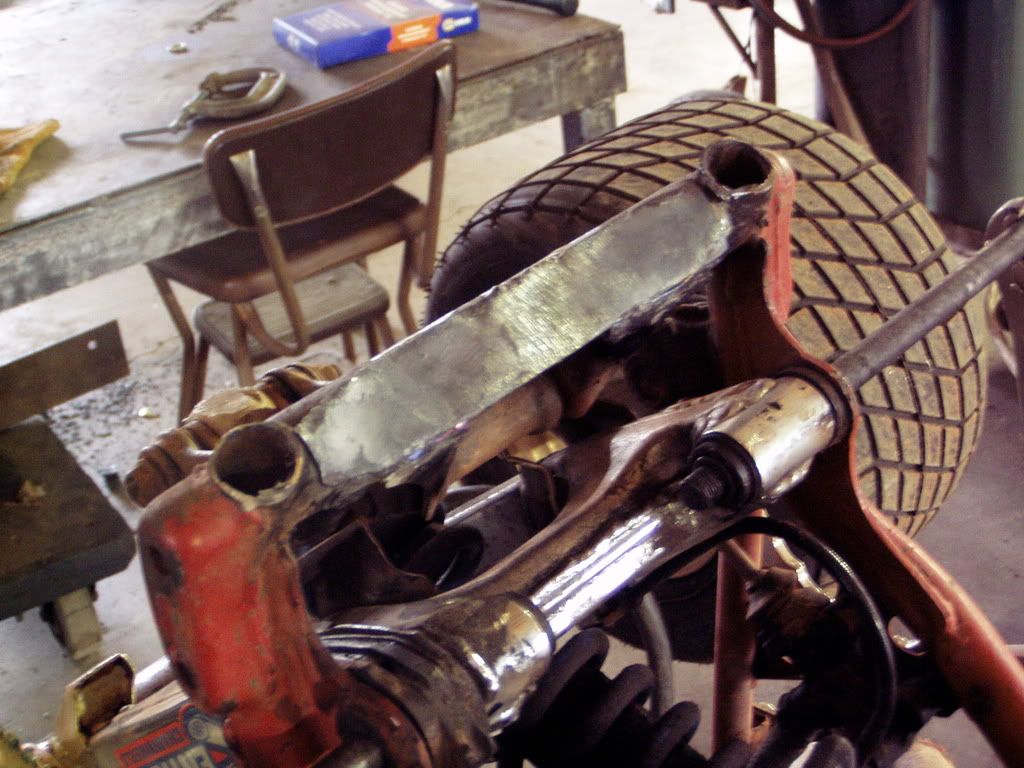
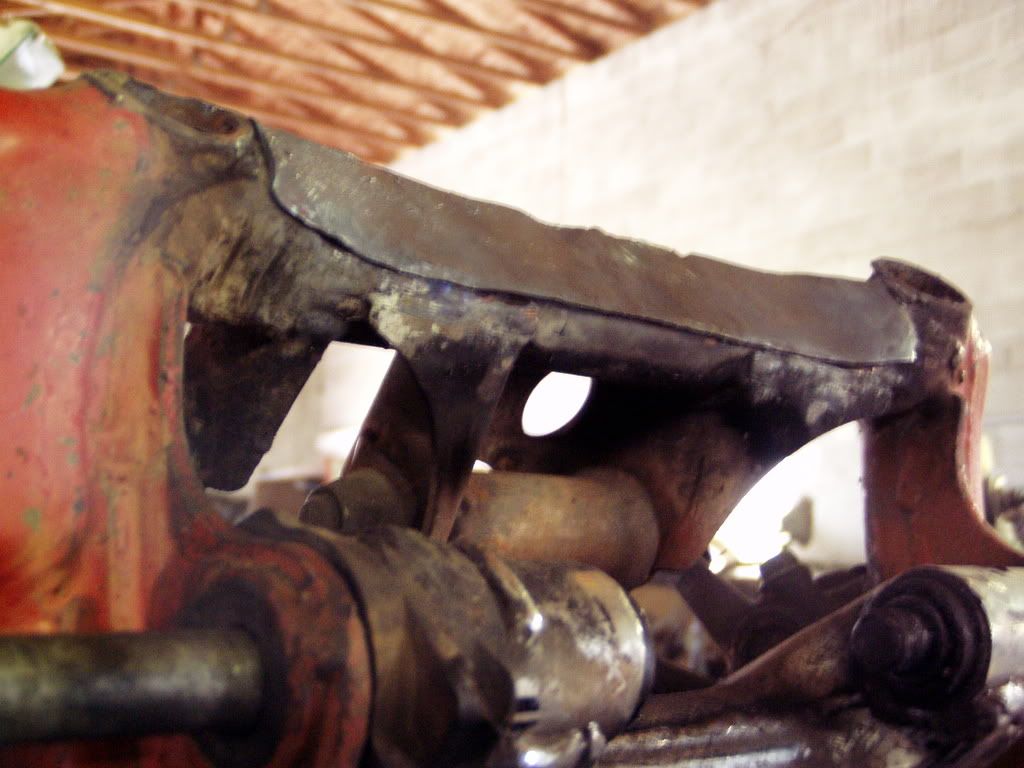
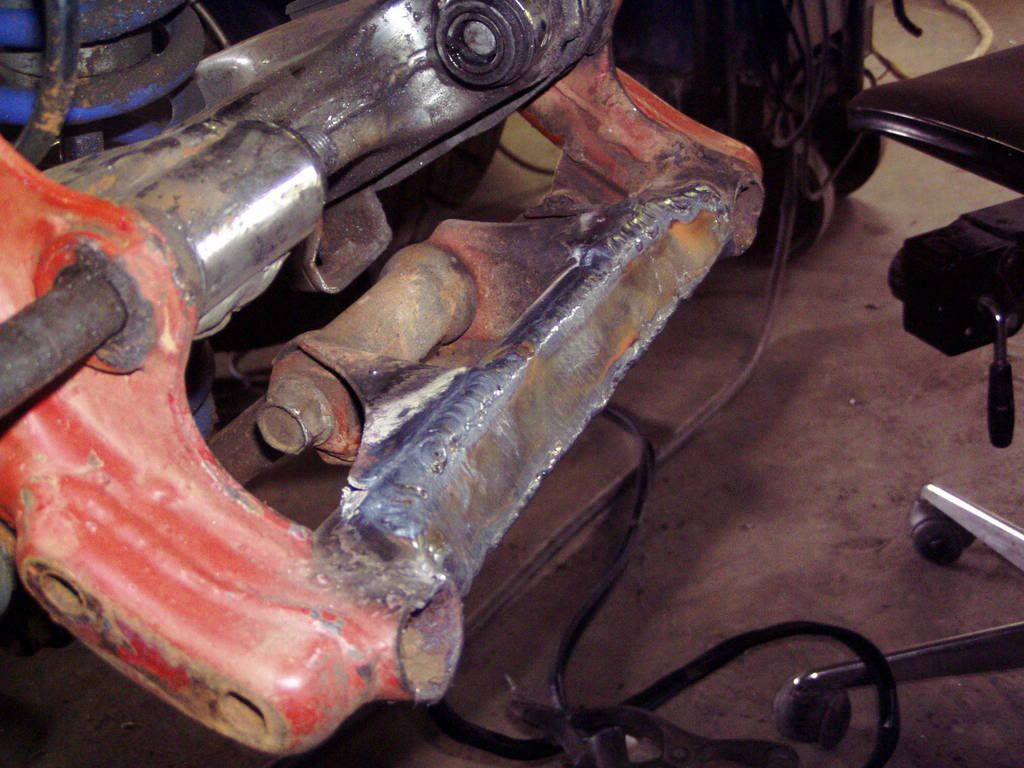
Heres the bottom cross member after I've ground down a nice flat side on it, to cover back up with the piece of sheet metal as I described earlier.
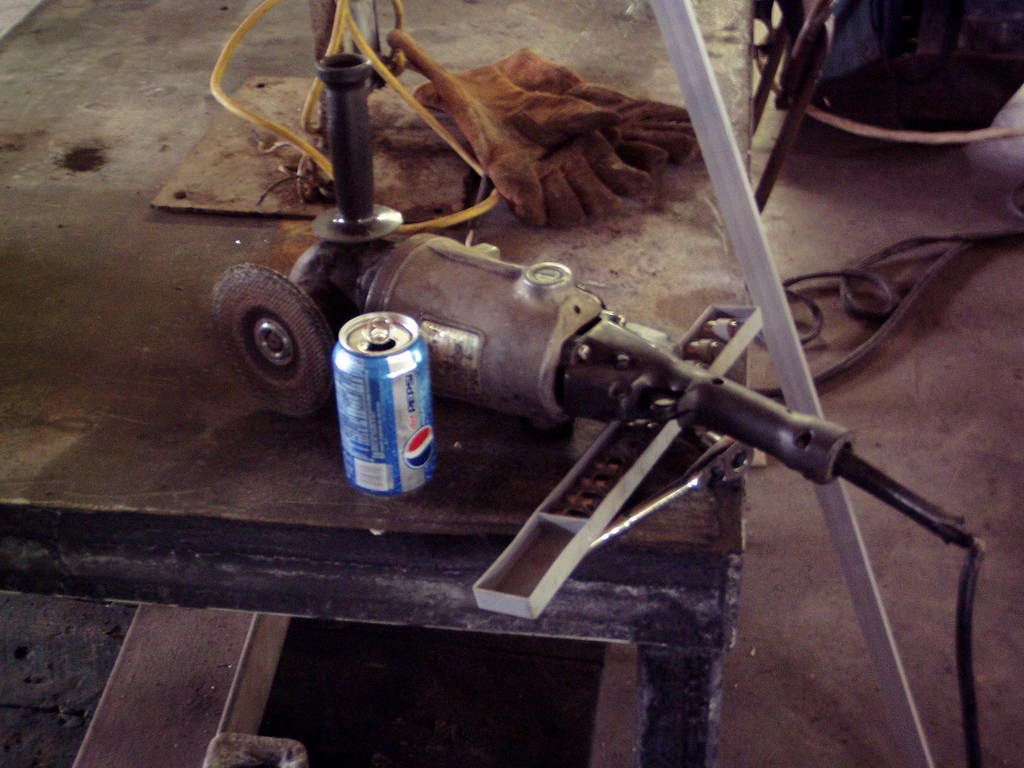
And heres my weapon of choice to get that job done. Sure as hell beats one of those little puney grinders, this thing actually REMOVES metal without taking a week to do it
Initial test fit of the piece I'm welding over. A little bit thinner then I would have liked (being .065, ) But, good enough.
Weld plate tacked over the area now in the center.
Another view of the weld plate. After it was tacked down, I heated it with the torch and massaged it to a little bit better contour where it fit the frame tube better then it did before.
Well, this WAS a bottom view (because the thing was upside down in my stand) but its actually the upper side of the frame where the shock linkage brackets are. This was another picture after I had heated and molded it to the contour.
A view of it on my most ingenious stand.
Just finished welding the bottom and sides of the plate.
Next weld area after being stainless wire brushed thoroughly and then wiped clean with starting fluid on a rag to remove any dust or other crap on the surface.
Another view of the top weld area, cleaned and prepared.
Another view. This camera is getting hard as hell to take decent pictures with. How about we start a "Fund Billy a new digitial camera" campaign?
Here we go. Got my chair, got my TIG torch, got my welding rods sitting on the subframe, got my fire control pedal, we're about ready to rock and roll.
Always finding new and exciting ways to not give a hoot in hell
Catch me if you can
Last one before I start welding.
POOF, there it is. This stuff was a little weird to weld. Beads could have looked a lot better.
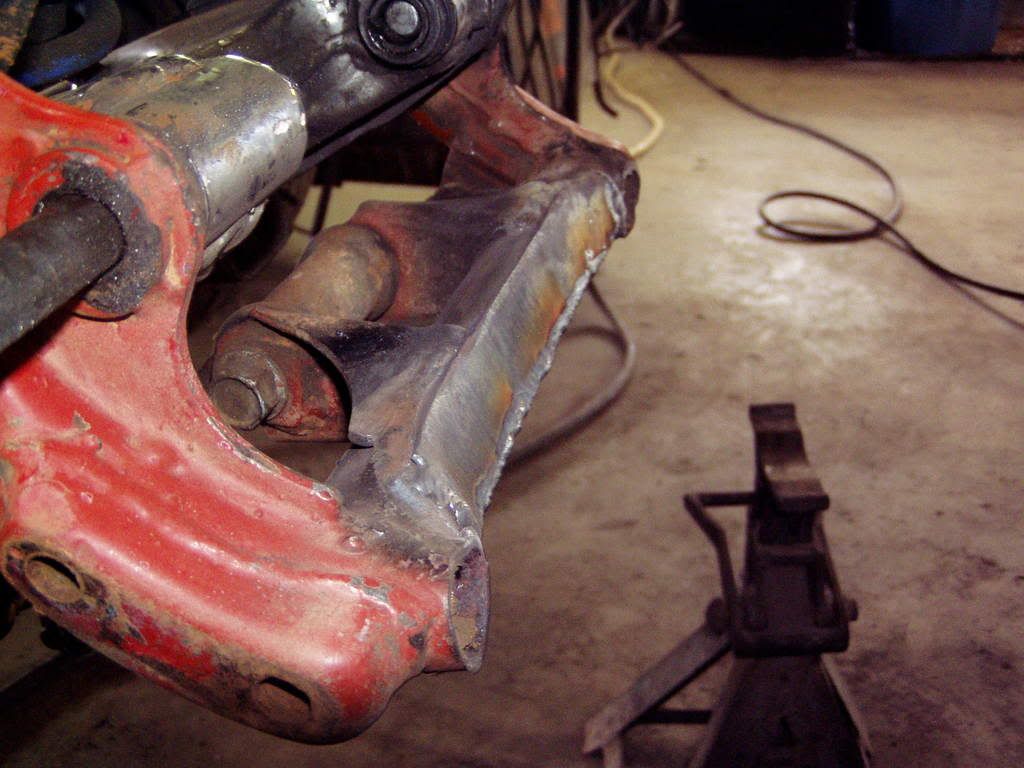
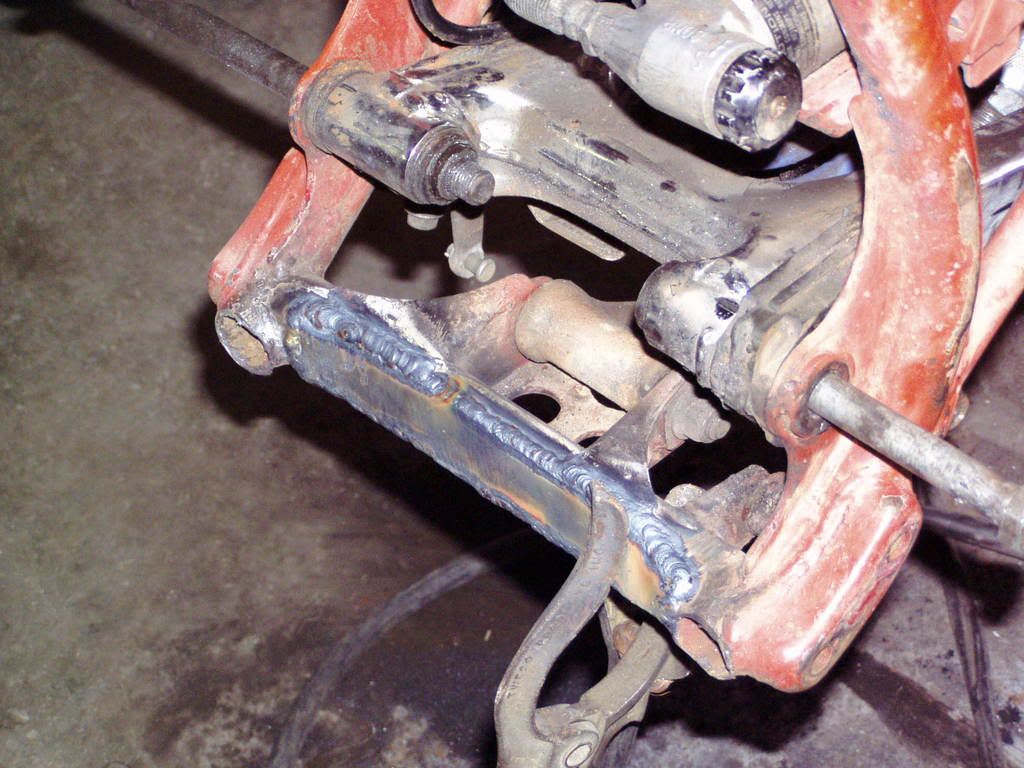
Another view of it now completely surrounded with weld. This is all going to be blended with a grinder and hopefully when I'm done you wont even be able to tell what I did there.
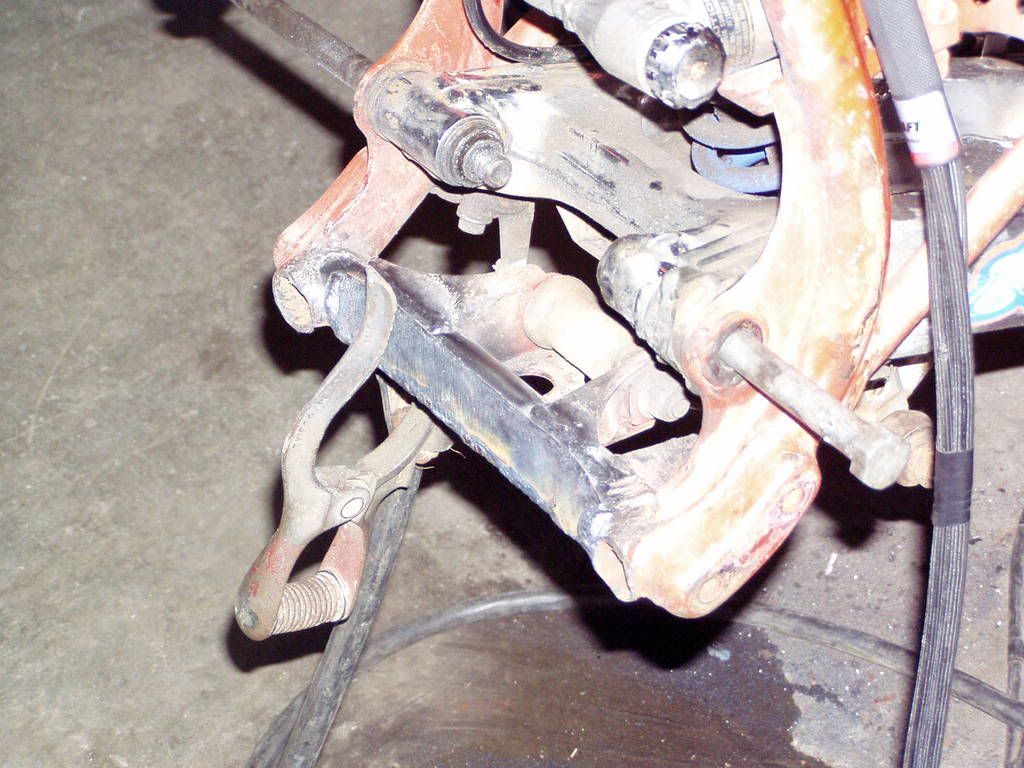
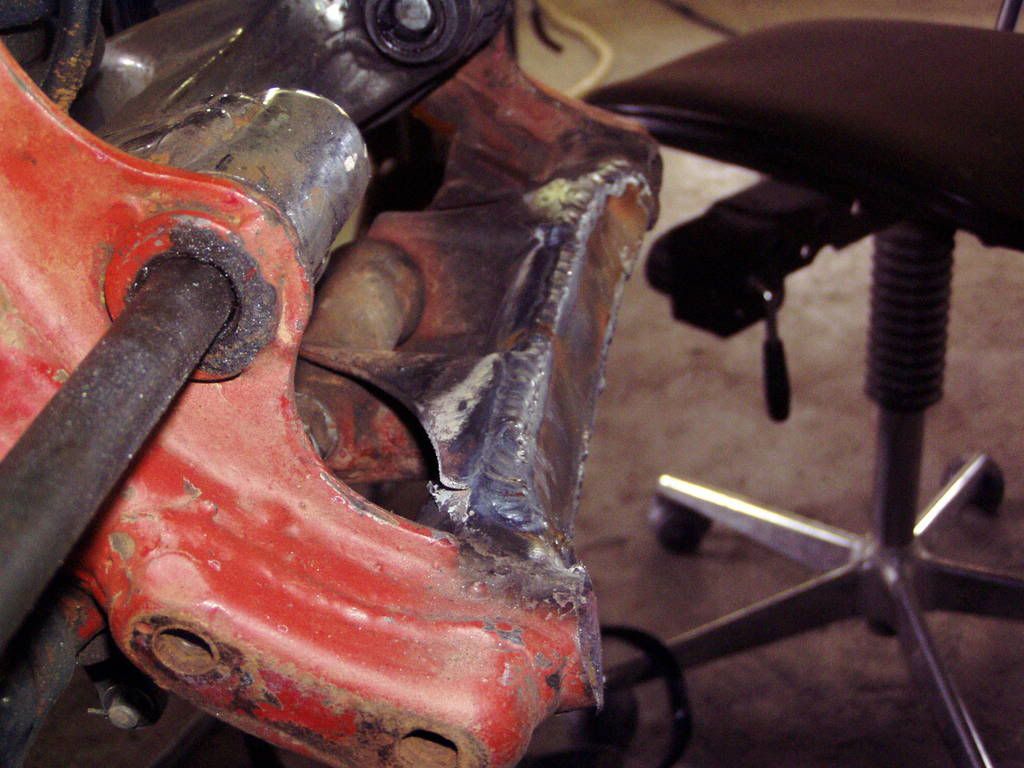
These picture gives you a good idea of the clearance I gained. I think this is about the best you could do and still use that bottom rail, I mean without totally re-doing it and making a new one and making all new tabs for the shock linkage which would be a real real pain in the ass especially since the pegs mount out on the ends of this tube. Thats why its not flattend all the way out to the ends, it sort of ramps back up to the regular height. I'm fixing to go back over to the shop, I will probably work on grinding that down and trying to blend it. Might also set the motor back in it and see how it looks now with the cut head too.
Power User
4 Wheels? Huh?
not to shaby
you know, with a new coat of powder coat those welds wouldnt look near as bad as most of the factory welds....man they suck
i know this is a roundy round bike but just to let other know if this was to be for MX that pipe will bow in toward the motor from the presure of the shock linkage.
for MX this pipe should be replaced with a curved thick peice of chromeoly...maybe .120 wall
80s......185 atc, Yamaha tri-moto 200, 85 200x with tons of work
90s......89 Suzuki quad racer 250 (raced 250 A class for 6 years, late 90s.. custom framed 250x with long travel shocks and a built 350x motor.... built Honda 110
00s...... chomeoly framed 350 RX with all the goodies (thanks to my bro)
2012.....Replaced the 350x motor for a 444cc YZ426
WWW.HREATV.COM
Power User
Teaching quads a lesson
looking good but i am not sure why you cut the head mount off. If you are changing the lower tubes as you are you could have used the STOCK head stay mounts and bolted them to the stock cr500 head. it works fine. the good thing about that is you could have rebuilt the top end in frame. its not to late to reconsider. it would also make a lower center of gravity for racing.
The purveyor of "Plan B"
Teaching quads a lesson
I think Billy's more concerned with perfect swing arm pivot point to output shaft alignment.
To get this perfect its almost necessary to change that lower tube.
"Yes its broken, but does that really surprise you?."
"What happened? What does it look like happened?!?!"
Always finding new and exciting ways to not give a hoot in hell
Catch me if you can
Correct. I could have lowered the motor enough to fit the head stay in there, but the sprocket and the swingarm pivot would not have been level. I've got pics with it in the frame and a bunch of other stuff test fitted to it. Uploading now.
Power User
Roostin Away
Billy, I would also suggest you hang the motor from the origional top mount. It makes the pipe fit lots better, and plug changing Is easy. The Intake boot fits just like the stock motor.
83 ATC 60-R Cr60 converted with Zinger parts.
83 ATC 70.
83 Tri zinger
ATC 85-R Cr85 engine on shortened 86-R frame.
ATC450AF
86 310-R Drag racer
440 snowmobile powered custom built.
87 Cr 500 Converted to Drag racer
Always finding new and exciting ways to not give a hoot in hell
Catch me if you can
Jason, thats very interesting. Your sprocket and pivot alignment is very good, and you have room to use the head stay. For some odd reason, I do not. I'll be posting pics here in just a second.
Check my feedback before buying from me
Catch me if you can
sorry billy gota hijack for a min, Jason, if you have the motor hanging with the stock head mount do you have the dimple or recess the area on the lower linkage bar? (what billy cut out and welded) still?? thats alll....please continueOriginally Posted by Jason Hall

The purveyor of "Plan B"
Teaching quads a lesson
Looks like you might want to drop it down a hair Billy. Almost looks as if the output shaft is a hair too high.
"Yes its broken, but does that really surprise you?."
"What happened? What does it look like happened?!?!"
Power User
Teaching quads a lesson
Billy
yours is to high. you ahve to take the drop into account
Always finding new and exciting ways to not give a hoot in hell
Catch me if you can
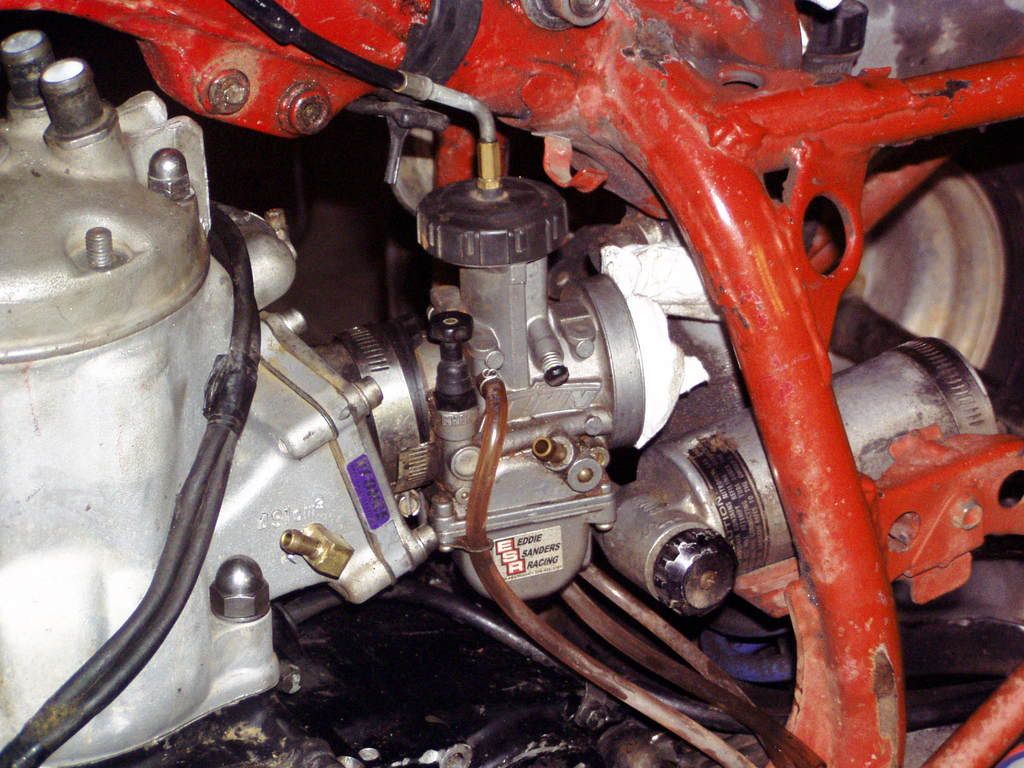
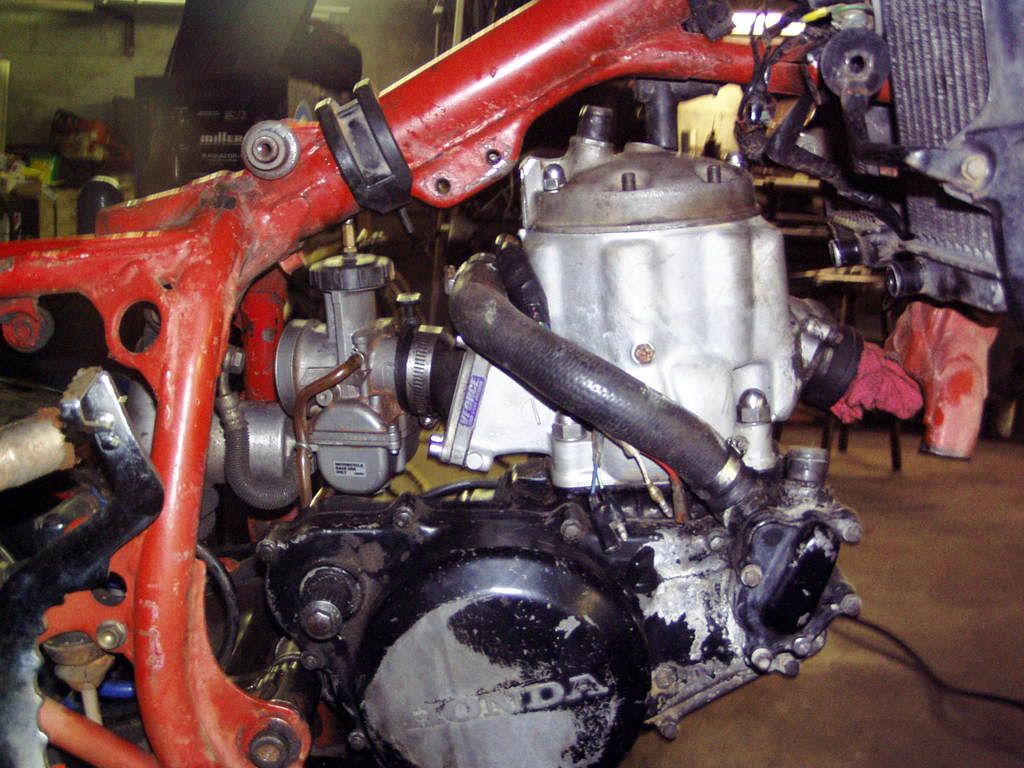
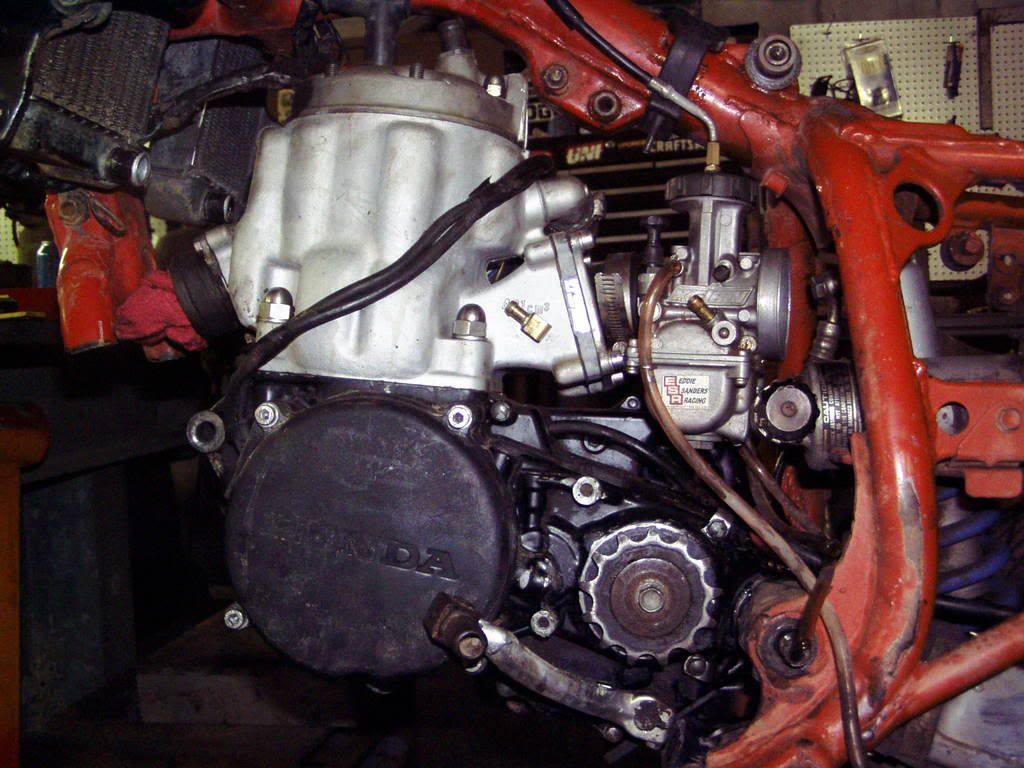
Carb fitment is excellent. I'll have to run a foam clamp-on air filter but thats not any problem. The shock reservoir can be loosened in its clamp and even slid back a little bit further for some additional room.
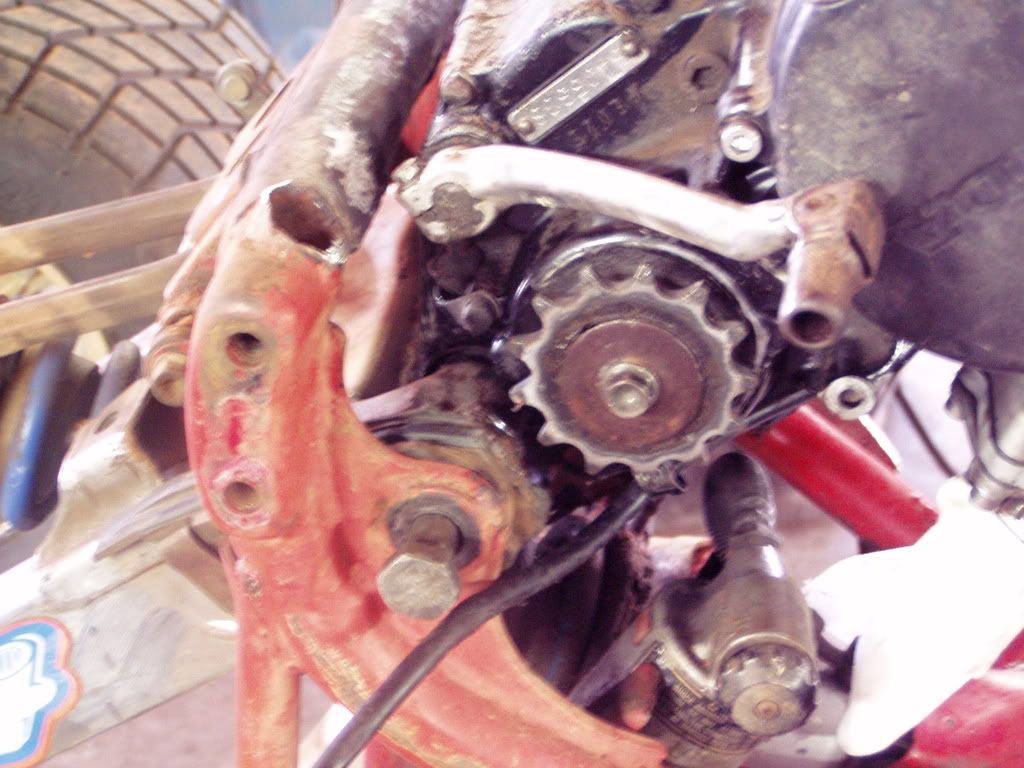
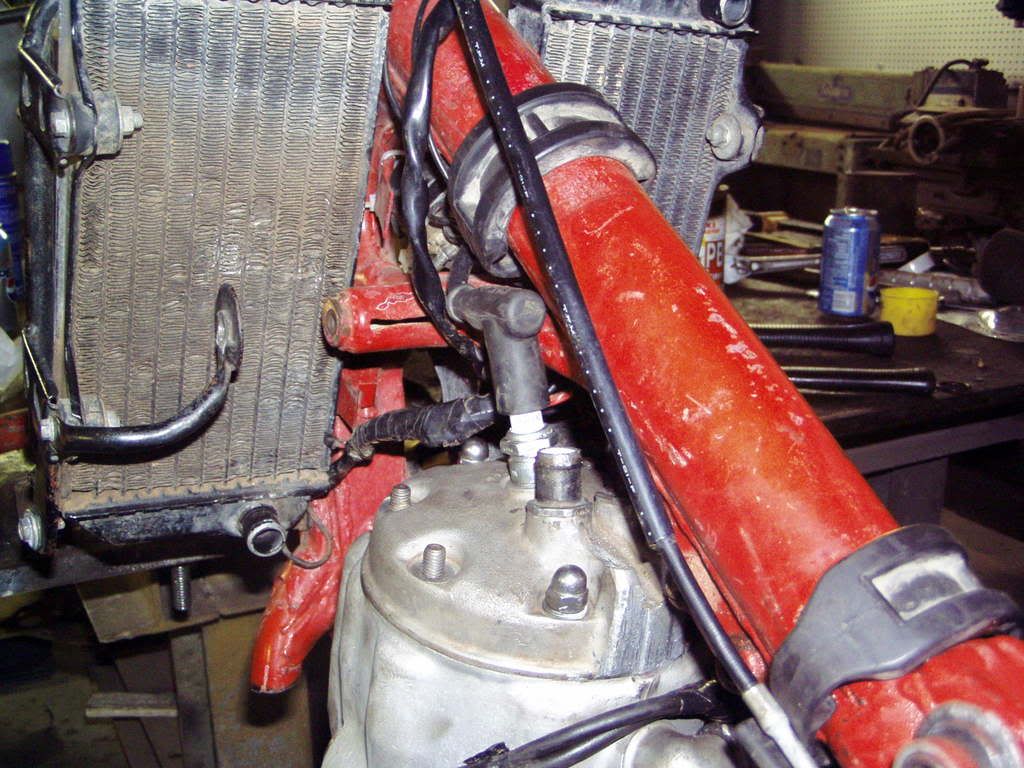
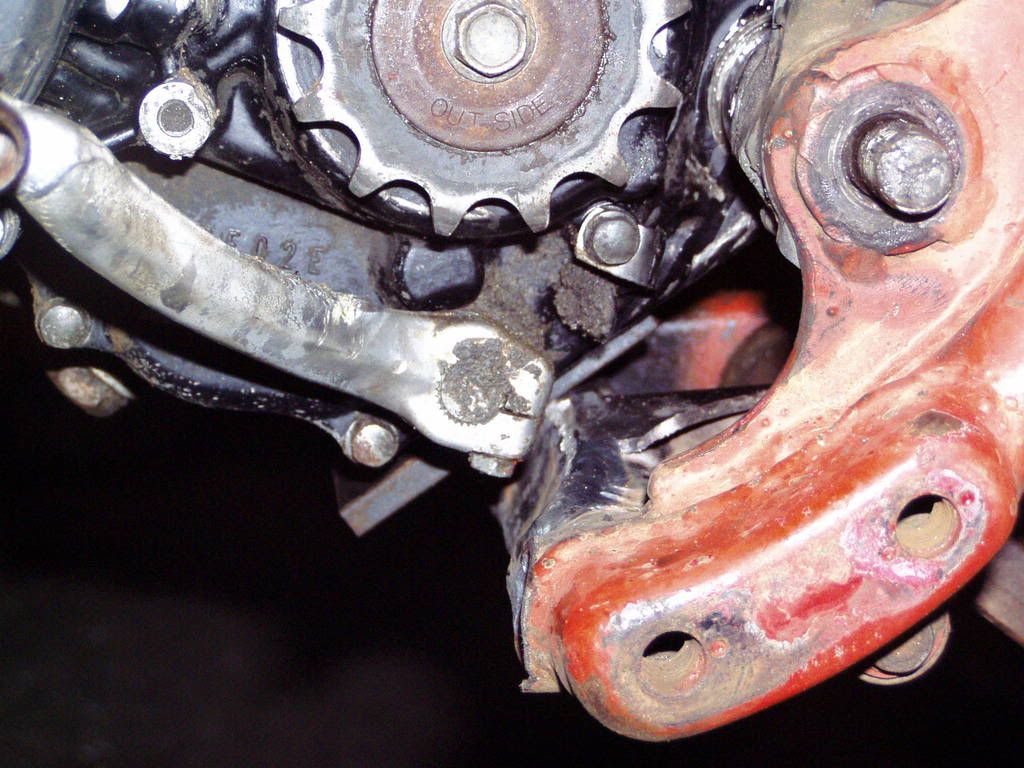
Shows engine offset in the frame for chain alignment. Many people don't know or realise it but the 250R motors are offset in the frame like this too. Its weird but its jus the way they are made.
Another shot of the carb, and part of the motor in the frame.
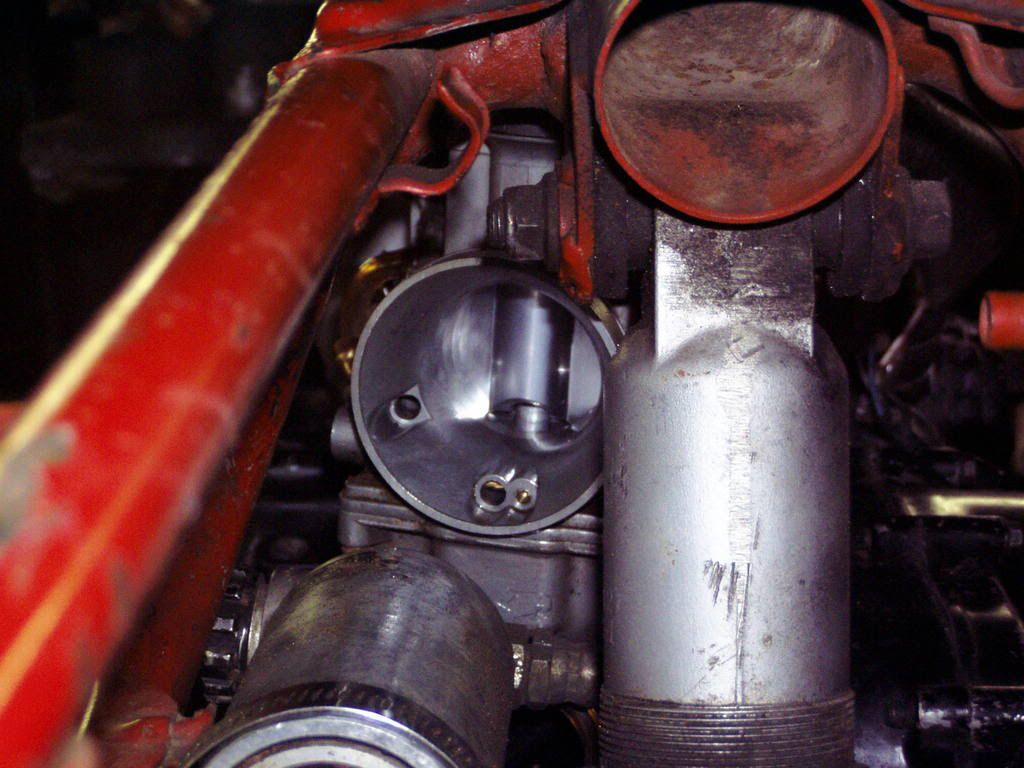
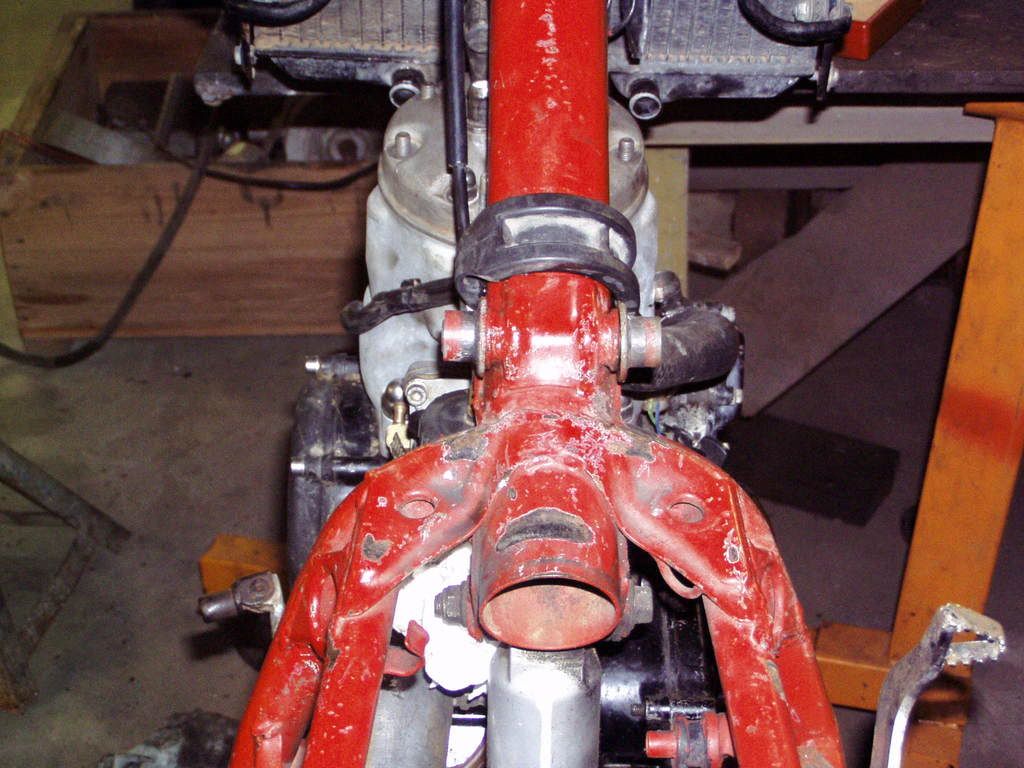
If I keep the angle I have now, this looks to be the next major hurdle to tackle.
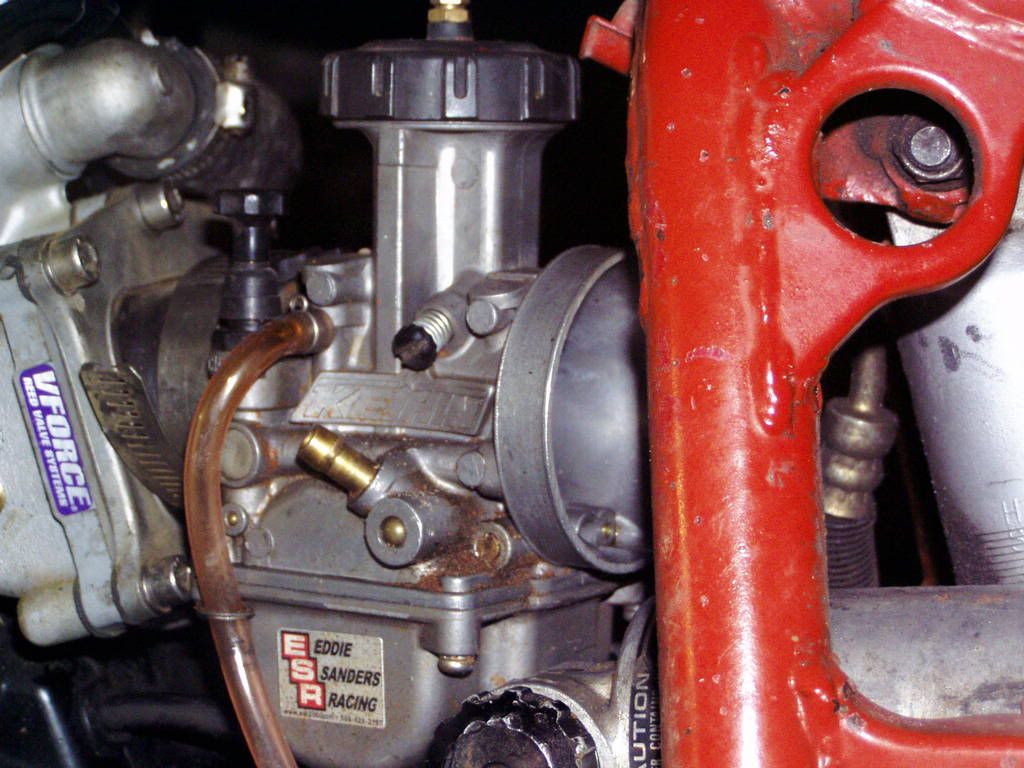
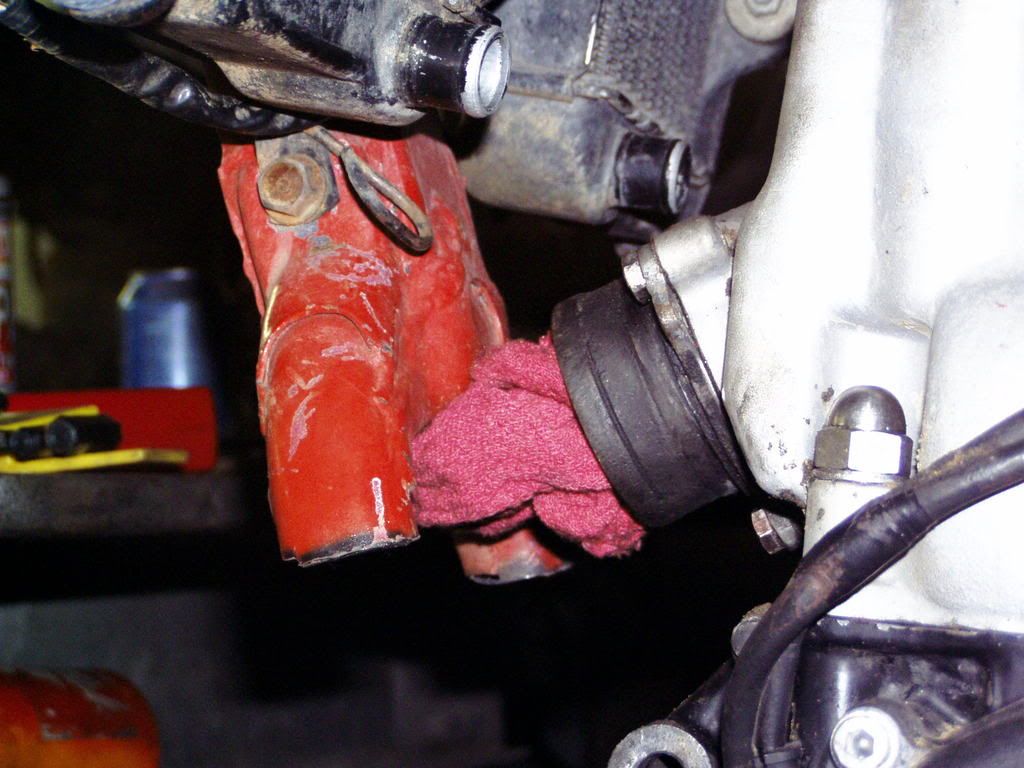
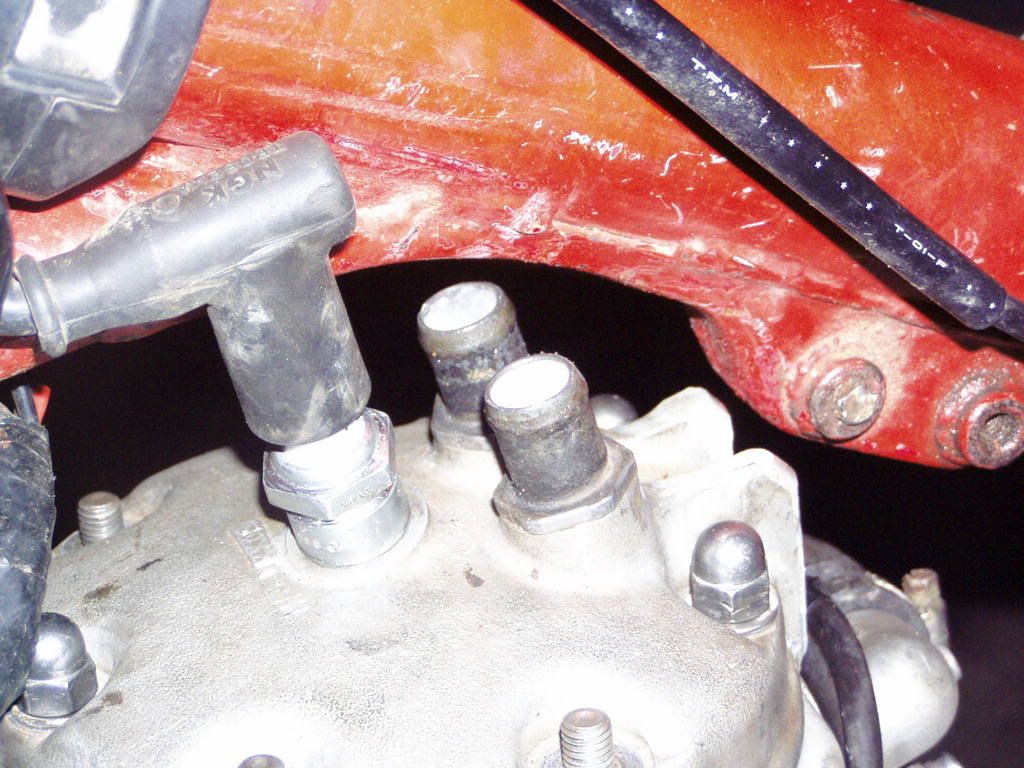
Spark plug fits in, and the boot slips on and off pretty easily luckily.
Another shot of the exhaust/frame angle and also shows how the double water necks on the head are gonna have to be angled outward for the hoses to fit since they are directly under the frame now.
Another good shot of the spark plug and also the waternecks.
Last one of the plug and the waternecks.
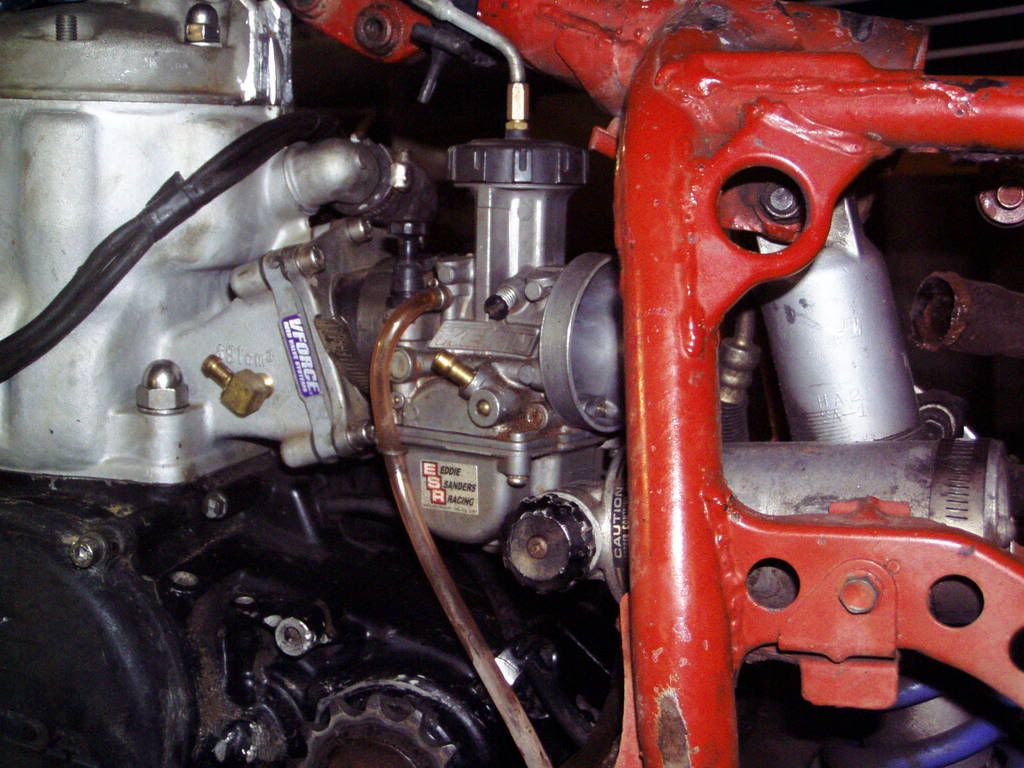
Chain alignment. Looks close now, but my preliminary analysis tell me I'm going to need to shim the sprocket in towards the carrier a slight amount.
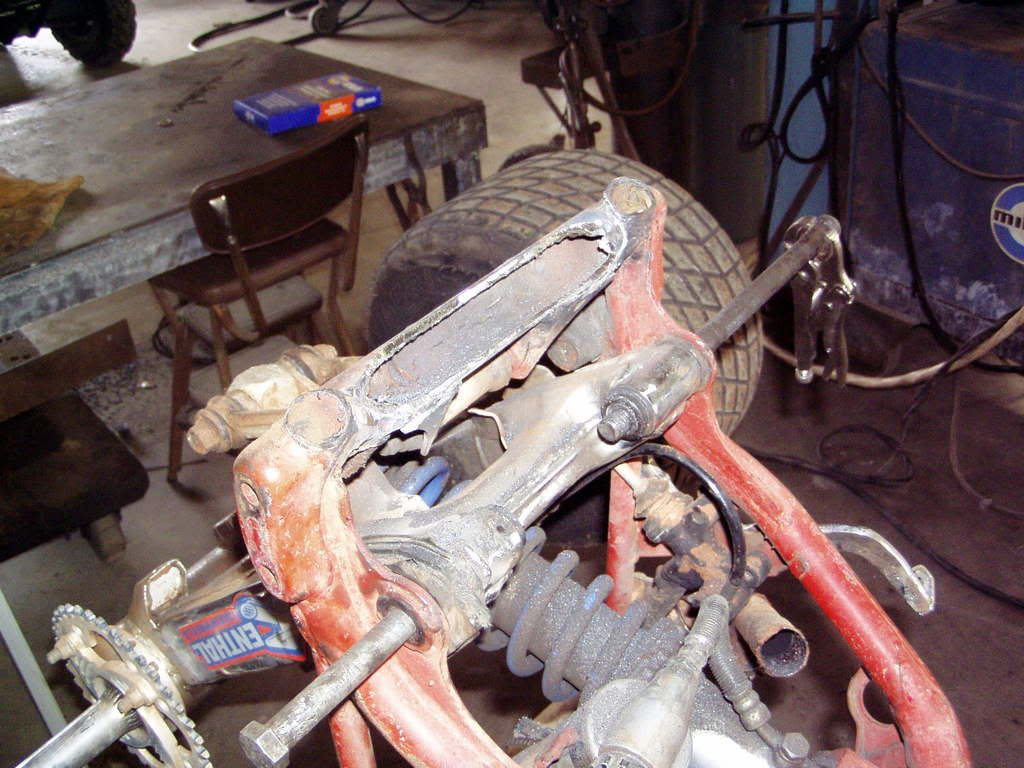
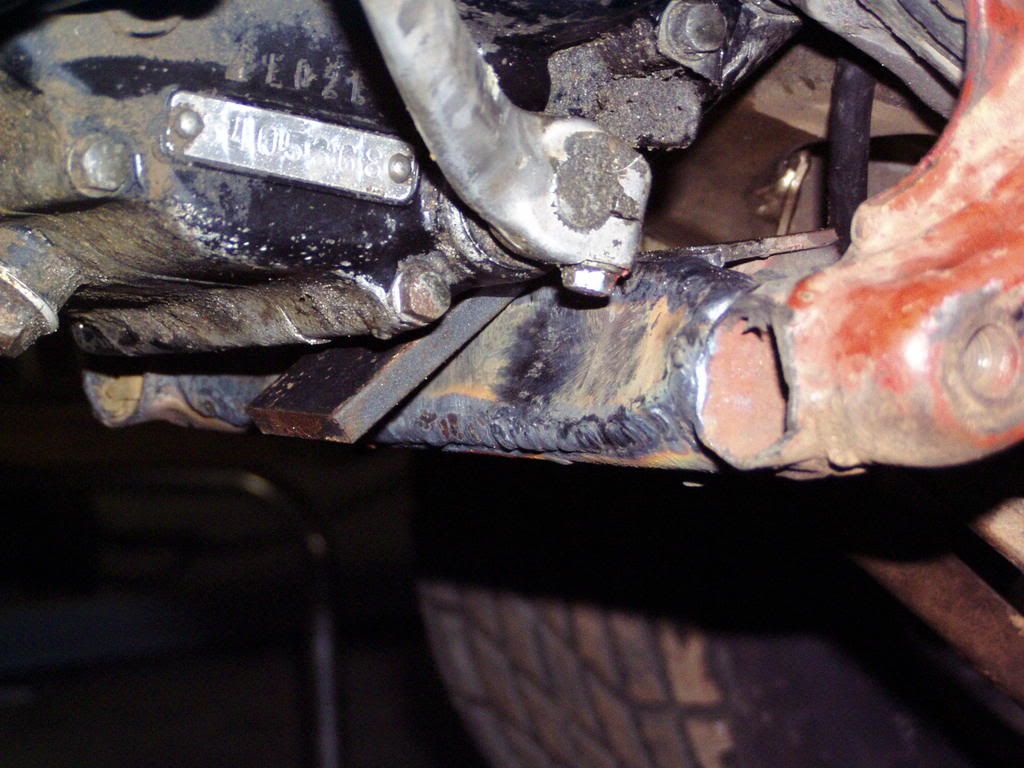
Space between the bottom of the motor and the bottom cross member. That peice of flat steel is just a wedge to hold the thing into position. After looking at the first picture some, it appears the motor does in fact need to come down some more to make the alignment with the sprocket and pivot joint level. I thought I had it pretty close but I guess it was deceiving. Easily changed, theres nothing holding it in there right now really.
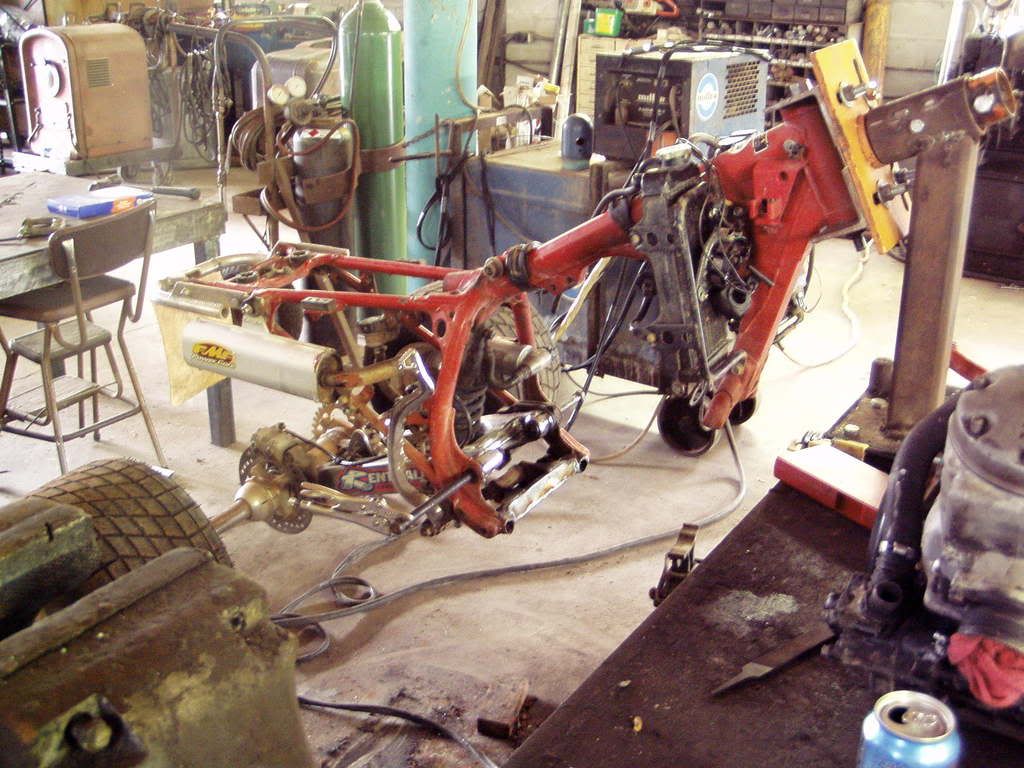
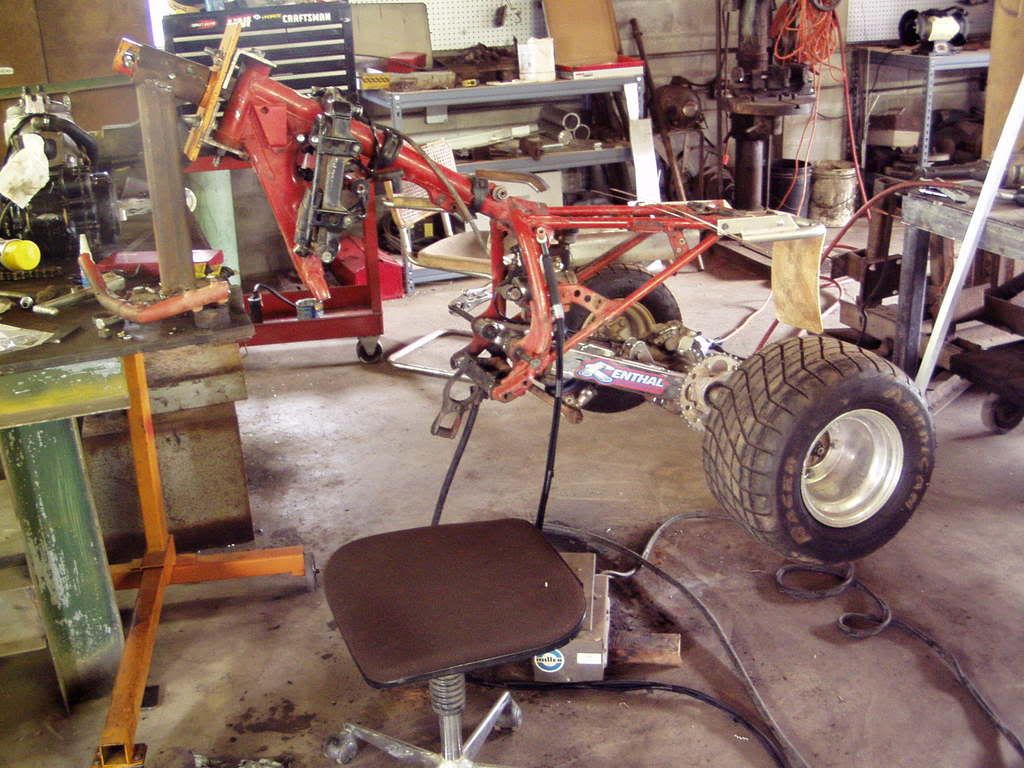
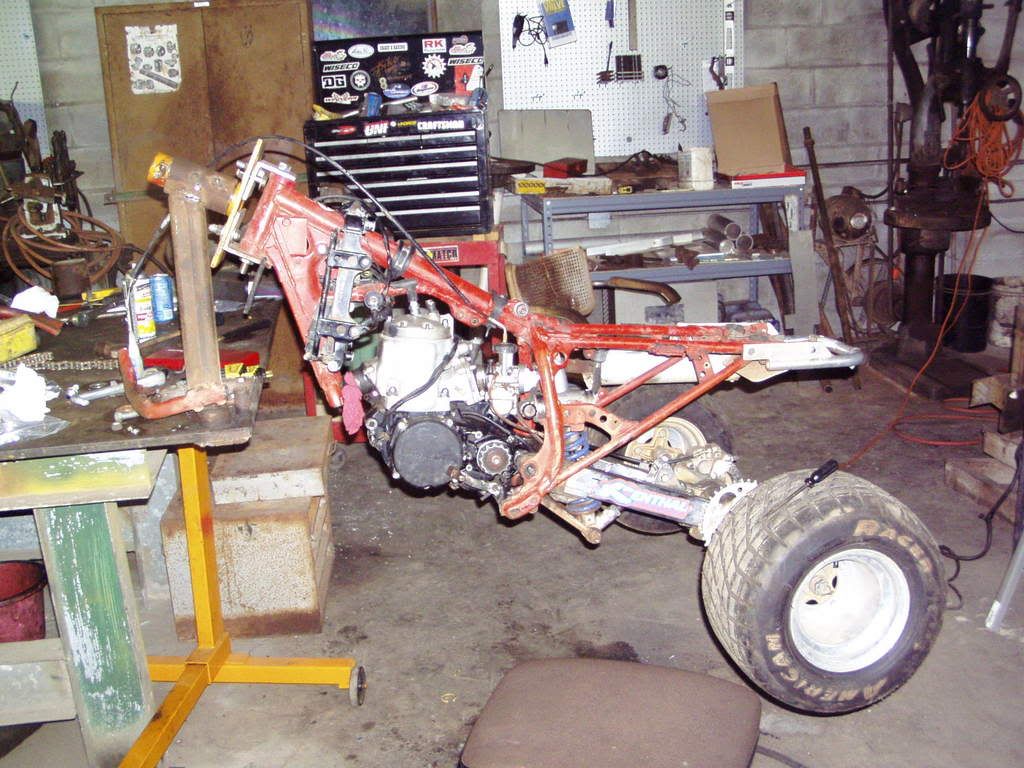
In the stand. At Home. Being modified.
Always finding new and exciting ways to not give a hoot in hell
Catch me if you can
Yeah, after looking at the close up pics, you guys are right. It needs to drop down some more. Wonder why it looked level in the shop...probably the angle the thing is on the stand.

 Reply With Quote