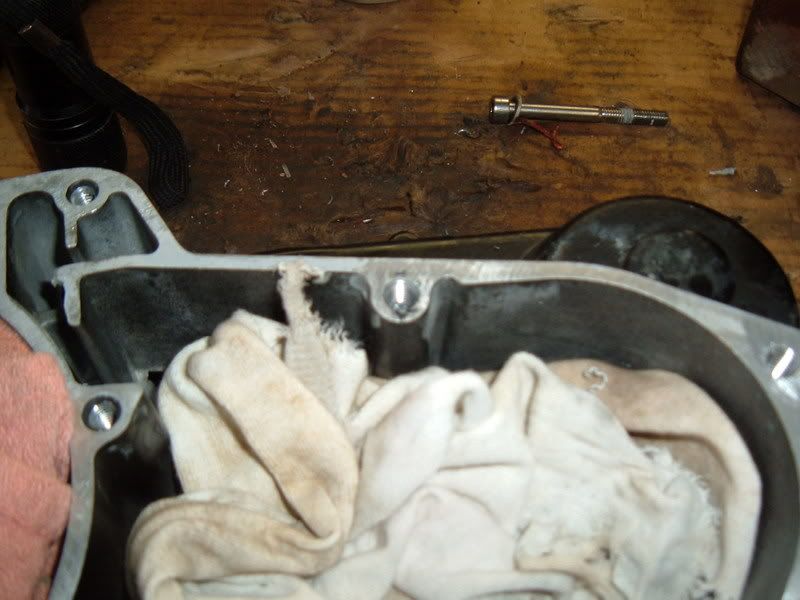
I am doing a Tri-Z engine for a friend,and upon teardown 3 of the case threads are stripped...
We have all seen this before, and after doing a search on the site, I found many questions on how to repair threads, but no step by step tips.
So I figured this would be a good time to demonstrate how to Helicoil a stripped bolt hole.
I understand to most of us, this may be old news.
But there is always a new guy that could use the info..
Lets get started..
First you have to indentify what size the hole is, and what thread pitch it is.
Most holes will have a diameter size, and thread pitch size.
Diameter size in this case is metric in reading.
(M-6 x 1.00) is what is needed to restore the threads in this engine case, back to original size.
This is the breakdown of how to tell what you need.
Many times you can take the bolt you need to the parts store, and they will size up the proper repair kit for you.
Or if you have a tap and die set, you can use that to tell you what size you need to use.
(M)= Indicates that you are using a metric fastener.
(6)= Indicates this size in millimeters the thread diameter is..In this case the bolt threads will be 6 millimeters in diameter.
(1.00) Indicates the thread pictch (or the closeness of the threads).
The higher this number gets, the more coarse or (spread out) the threads will be.
For instance a (2.00) will have less threads that are thicker, than a (1.00) reading would have.
Metric diameters can range from (M-6 all the way thru M-12 and larger)
The usually increment in steps of 2 millimeters.
So they would go M6,M8,M10 and so on...With the overall diameter getting larger as the number gets bigger.
Lets get to the repair...
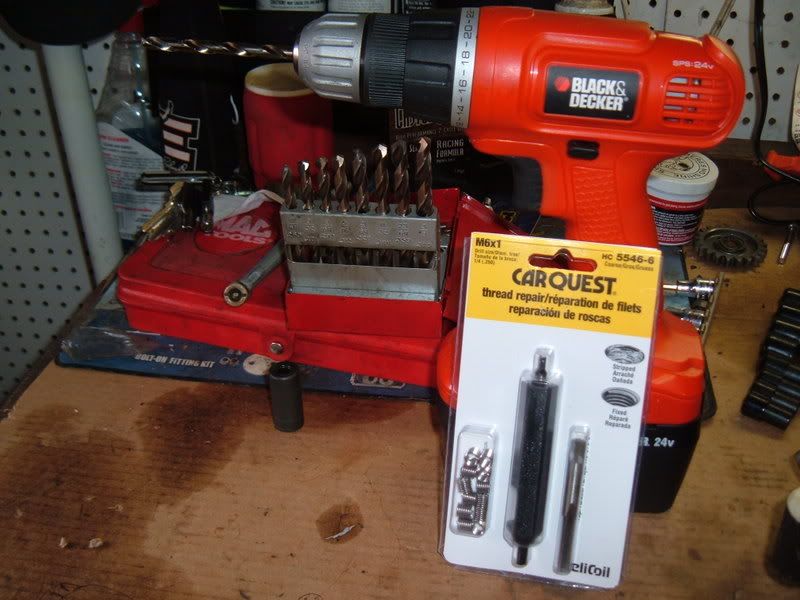
The tools you will need...
Drill
Drill bits
Red Loctite
Safety glasses!!!!! Please use SAFETY GLASSES when drilling metal and using taps.
Compressed air and a blow gun for cleaning the holes.
And the proper kit to repair you threads.
The kits can be bought at any Good Auto store.
Napa
Carquest
and the like.
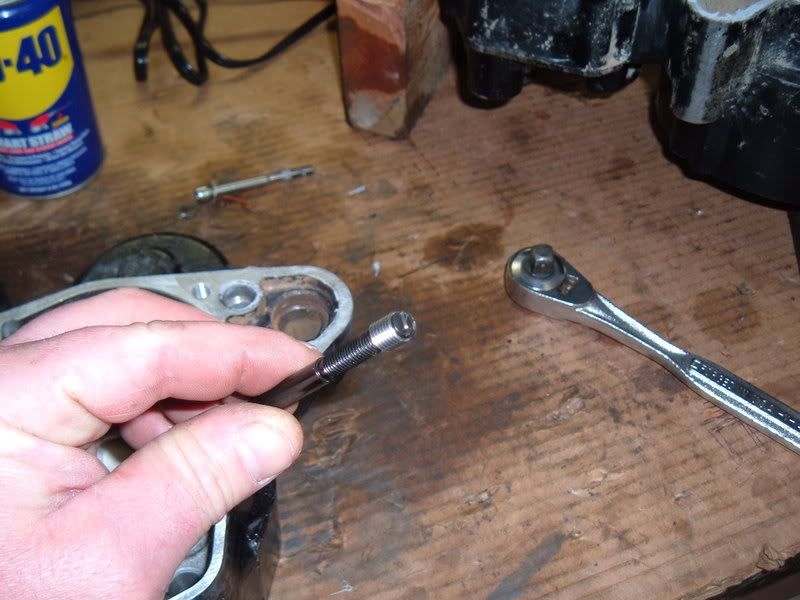
After identifying the proper size I need, I purchase the kit.
This kit will come with, the thread inserts, a installer tool, and proper tap size..
They can range anywhere from $40 to $100 bucks for the kit. Usually the larger the the threads are, the more the kit is. Oil drain bolts are usually around 12 millimeters in diameter and get rather expensive, vs. the smaller guys.
This kit was $40..
You will notice that the left hand corner of the package indicates the size of the kit.
M6 x 1.00..
It says to use a 1/4 inch drill bit to drill out the damaged hole.
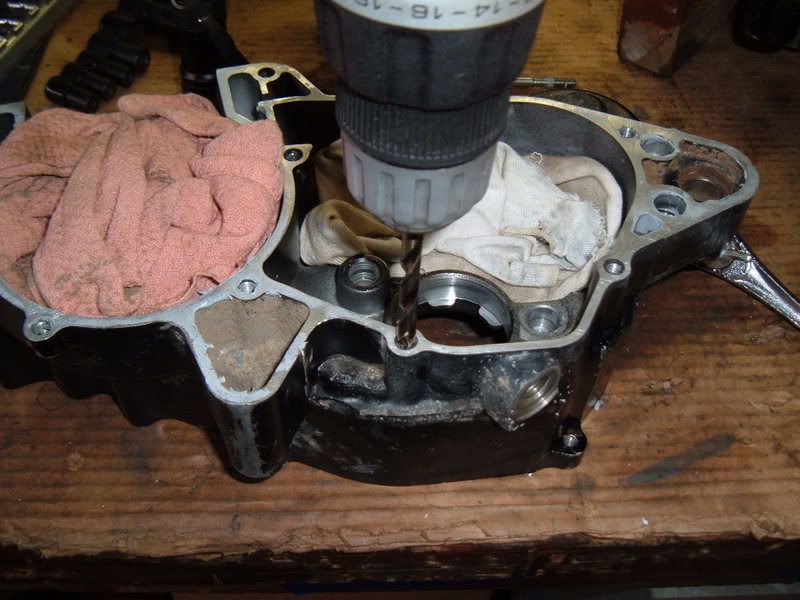
After settting up my drill with the 1/4 inch bit, I will oil the bit for lubrication and begin drilling out the damaged hole.
!!!!!!!!!!!!!!Do not drill any deeper than the original depth of the part.!!!!!!!!!
Next blow out the metal chips with compressed air, be sure to protect your eyes,and any parts that could be damaged by metal debris..
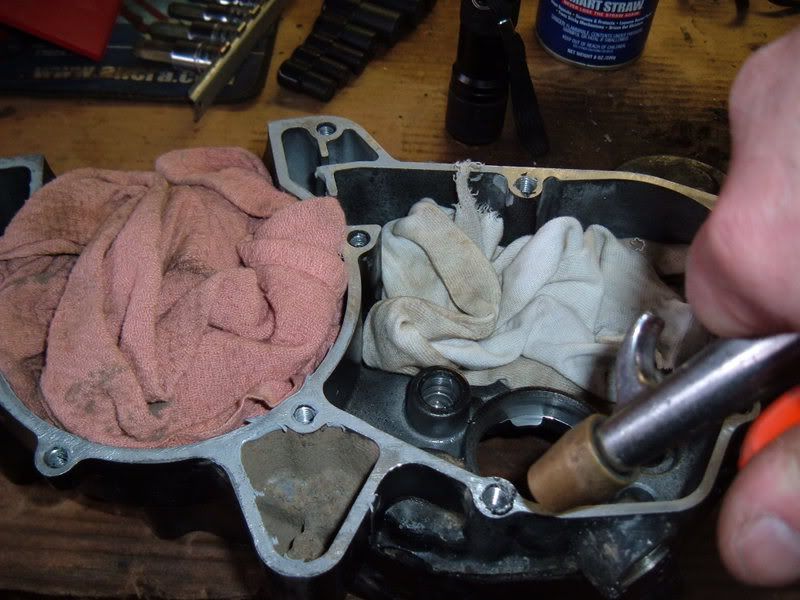
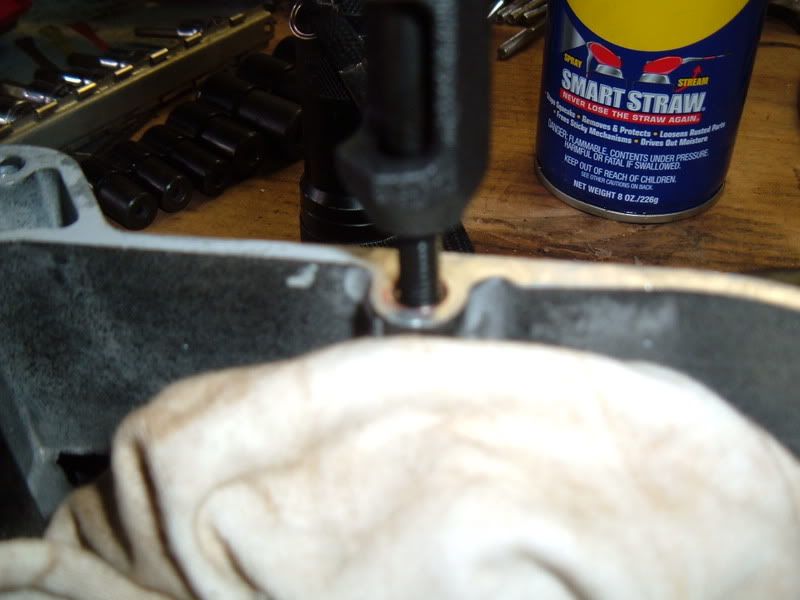
Next using the supplied tap that came in the kit, oil the threads and tap the hole..
BE SURE you tap the hole PERFECTLY STRAIGHT!
A crooked hole will cause you not to be able to install the bolt properly when finished.
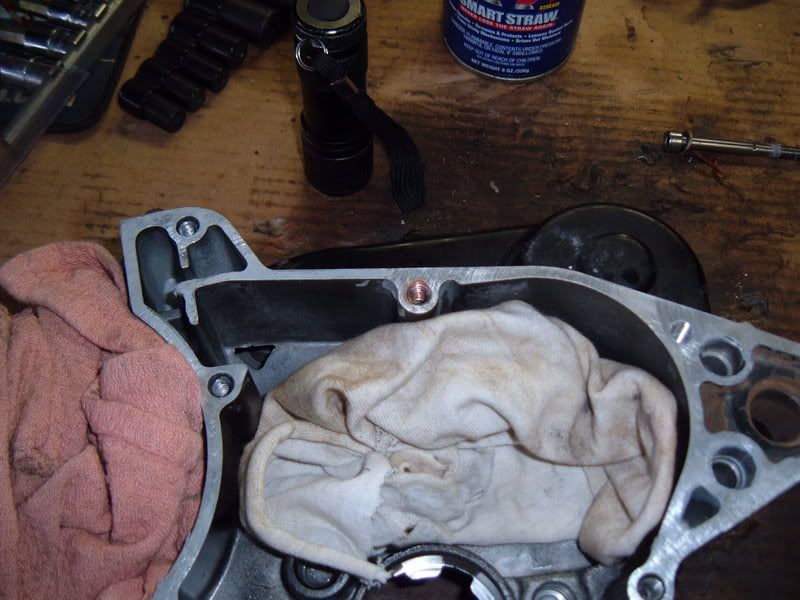
Once you are done you will see threads in the case.
Once again blow out the metal debris from using the tap!
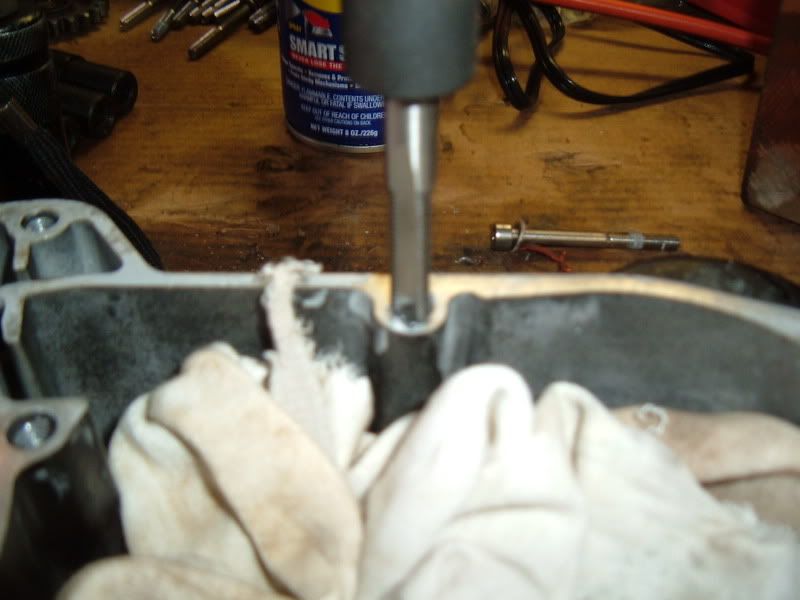
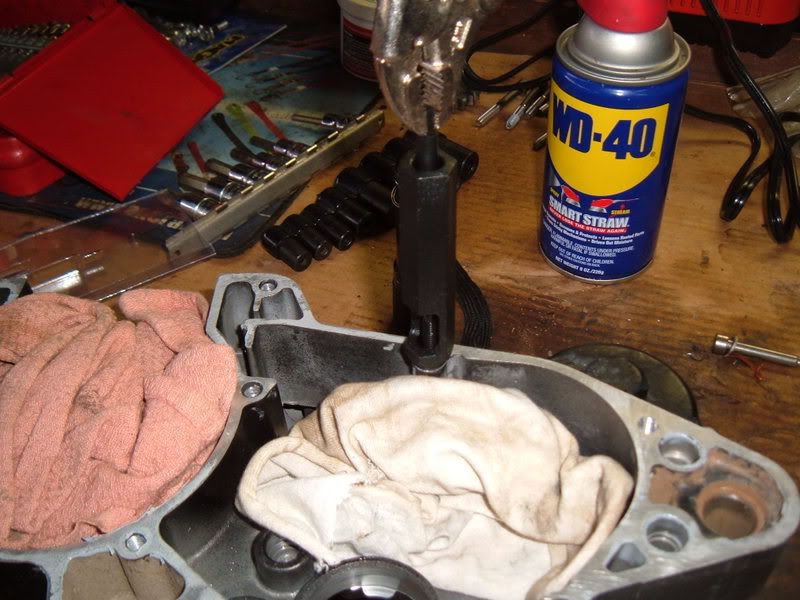
Next grab a thread insert from the kit and install it on the driving tool.You will see there is a tang that engages to the tool, so the tool can push the threads in.
Insert that into the Centering tool that comes in the kit.You will actually thread the insert into the housing of the centering tool, but only screw it into the centering housing a few turns.If you go too far in the centering tool, you will damage the insert.
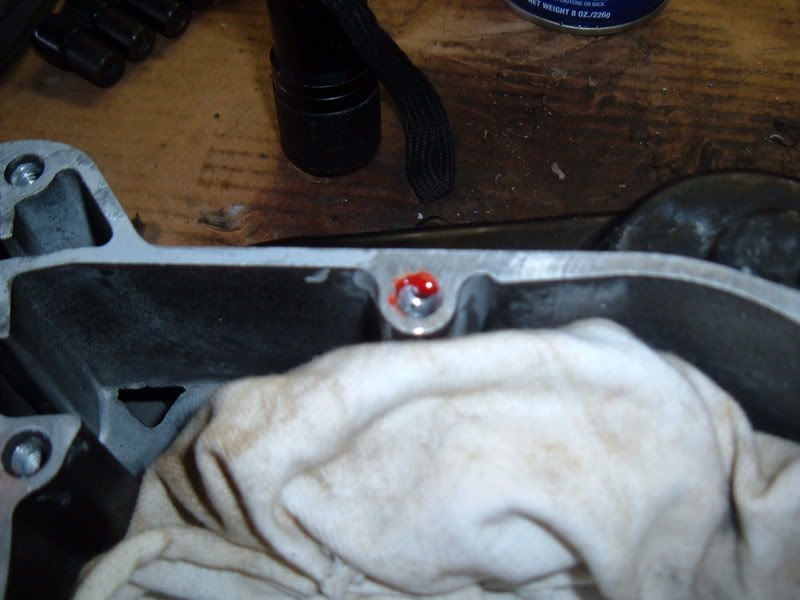
Next apply a few drops of RED loctite to the threads in the case.
This will help lock the threads into the case and keep them tight..
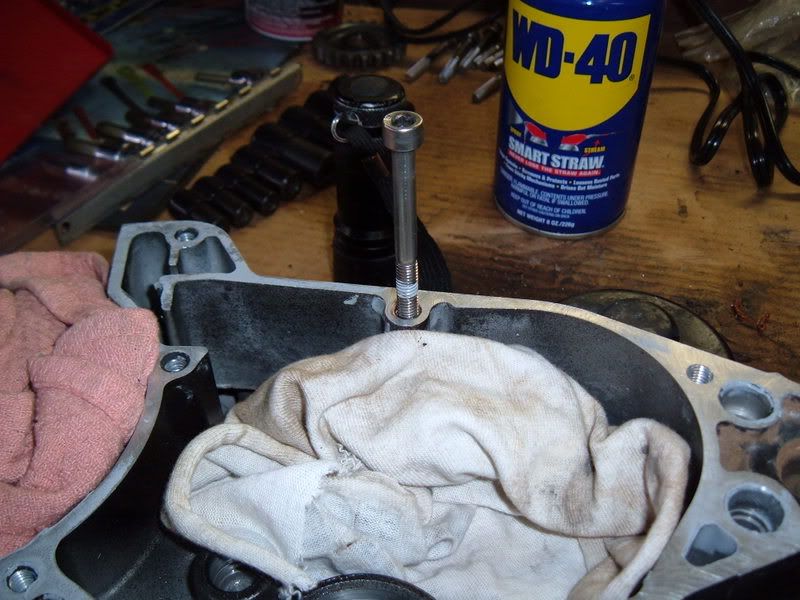
While holding the centering tool, posistion it over the hole flush with the surface keeping pressure on the tool.
You will now begin turning the insert down into the case.Hold the centering tool still while turning the driver at the top.
As the threads work into the case, keep the centering tool flush until it realese on its own.
At this point the threads will be flush with the case.When this hapens, the centering toll will release itself as seen in this pic.
Now at this time, use the thread installer to go ahead and put one more turn on the thread insert, so that the threads are just below the flush part of the surface.
When done, this will be the finished result..
Once you have the insert in the case or part, you have to go thru the threads with a punch and knock that engaging tang loose, then remove that tiny piece from the hole. Lastly, remove any residual/excess red loc-tite from the threads of the insert that may contact the bolt for the part. Failure to do so will more than likely cause problems with the bolts threading into the new insert once the loc-tite dries up.
A q-tuip soaked in brake cleaner will help remove excess loc-tite or spray some brake cleaner in there and blow it out.
Congratulations....
You just repaired your machine and you can use the proper bolts again and be assured that they will hold up for another 10 years.
Completely clean up the worked area,and allow about 1 hour for the red loctite to set up,and you can begin reassembly..
The Heli-coil kits come with instructions as well and using those in conjunction with this tutorial, it should make for a easy repair, even if it is your first time doing this.