I think we can get that thing held together pretty well Louis. I have a lot of 1/4 plate here I will use as additional bracing and support on the bottom and also the sides if need be.

 Always finding new and exciting ways to not give a hoot in hell
Catch me if you can
Always finding new and exciting ways to not give a hoot in hell
Catch me if you can
I think we can get that thing held together pretty well Louis. I have a lot of 1/4 plate here I will use as additional bracing and support on the bottom and also the sides if need be.
The purveyor of "Plan B"
Teaching quads a lesson
I'm confident too. The first one my machinist buddy did is super strong and it really doesn't look like anything special. I think the jig is going to be the hardest part.
"Yes its broken, but does that really surprise you?."
"What happened? What does it look like happened?!?!"
Power User
The day begins with 3WW
Jigs are easy enough. When the fitment is good it looks like you will have more then enough weld to not need additional plate.
Going to look nice I should add, not to put too much pressure on ya Billy.
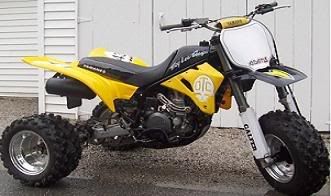
My Feedback 85 TECATE 500 08 Honda 450R
Wires, Hoses, & Digital Wizardry.
Got the holeshot
It was easy. Not as easy as regular forks, but nothing complex. It was just a few more parts & little bit more involved. Just follow the steps in the WP manual, which I or Billy can email to you if necessary. I did respring mine, but I can't remember what weight I went with right now. I'd have to look at the box to see what I got.Originally Posted by Louis Mielke

I think I have both the rebound & compression adjusted to the center of the range of clicks. Just play around with it and see how it feels. You'll find the sweet spot eventually, while having a lot of fun riding and testing!
Red Rider's Sand Machine Updated 07/23/14
The sun shines on a dogs ass every now and then
Got the holeshot
remember those bushings go bad aswell,then the fork puts pressure on the seal causing it to wear out premature.do a full rebuild on them,and the good seals.also are you putting in too much oil?if they compress so far,and the oil has no wear to go,the seal is the weakest link.
i can provide some plate 6061-1/4 to 1/2 stock.let me know,i can shear it off,put little bends in it,whatever you guys need.lmk!
Full Walsh CRF 450 hybrid 250r
The purveyor of "Plan B"
Teaching quads a lesson
The moto pro suspension place was SUPPOSED to check all the part for wear and service whatever the forks needed. Who knows if he actually did it or not so when I get them tore down I'll inspect everything carefully and order parts accordingly.
Thanks for the help brandon, if we need the plate we'll shoot you a message.
"Yes its broken, but does that really surprise you?."
"What happened? What does it look like happened?!?!"
The purveyor of "Plan B"
Teaching quads a lesson
Billy, here's an update. i think I'm ready to ship it to you unless you have any objections. Let me know man.
The jig was a pain and the stick welding isn't amazing or anything. it is held pretty securley. You man want to clamp it down to a table or something though,. This is really the best I could do. I suck I know.
Here's a comparison picture for giggles, the stock 400ex, versuses the new 500 arm, and hopefully once your done welding I can line all three swingarms up.
Lemme know man and I can ship tomarrow if it suits.
Last edited by Louis Mielke; 10-08-2007 at 07:19 AM.
"Yes its broken, but does that really surprise you?."
"What happened? What does it look like happened?!?!"
Always finding new and exciting ways to not give a hoot in hell
Catch me if you can
Send it this way mang, we'll make it work!
Always finding new and exciting ways to not give a hoot in hell
Catch me if you can
Louis I started working on your swinger this afternoon. I've got it joined pretty fair on both the top and the bottom. Most of the joints are gonna get atleast triple pass welds because of the thicknesses involved. The gaps in the joints are a little bit of a concern to me but I believe with the depth I'm beveling things I should be getting feel penetration with a little bit of bleed through to the inside.
The purveyor of "Plan B"
Teaching quads a lesson
Billy you are awesome.
"Yes its broken, but does that really surprise you?."
"What happened? What does it look like happened?!?!"
weee weeee weeeeeeeeeee ! ! !
The day begins with 3WW
FANTASTIC JOB GUYS!!! can't wait to see it installed!!!!
Always finding new and exciting ways to not give a hoot in hell
Catch me if you can
Progress thus far: I'm going to start out with some before pictures. I ground down all the gaps, the thicker areas I ground out a lot, and I will double pass them to fill them completely back in. That would mainly be on the sections on the top and bottom rails. The sides aren't as thick and don't need to be double passed if you V them down good.
Pic#1: The inside portion of the swingarm right behind the shock mount, Right hand corner, V'ed out and ready for some weld.
Pic#2: Same part as above, but the left hand corner instead. Couldn't V out quite the same as the right because the material was not as thick as it was on the right side.
Pic#3: One of the side, and edge joints V'ed out. Not sure if this was the left or the right side. As I mentioned before, you can see the sides themselves are not that thick, but the corners and the top and bottom portions of the tubing area.
Pic#4: Another shot of that one V'ed out corner behind the shock mount.
Always finding new and exciting ways to not give a hoot in hell
Catch me if you can
OK, now onto some of the weld pics:
Pic#1: Corner gussets in the corners behind the shock mount, and also the base/bottom pass on the right hand side tubing joint on the top side.
Pic#2. Both left and right corner gussets behind the shock mount, and also both of the top side base/bottom passes for both sides of the tubing joints.
Pic#3: Closeup of the left hand corner gusset behind the shock mount. Thats pure weld, pass after pass after pass of it.
Pic#4: Same as the above, but the right hand corner.
Pic#5: Base/Bottom pass for the top joint on the left hand side. Some of these beads don't look real pretty but the gaps I was having to fill in were quite impressive, I I had to kind of keep jumping around to keep the pool from "falling" in.
Pic#6: Single pass on the side of the right hand sides joint, and the base pass for the top of the tubing in that area. You can see how far down in the weld is when you look at the one right under that shock mount eyelet.
Power User
Teaching quads a lesson
Hey Louis, I just wanted to add a note to this thread. After RE-reading the whole thing I noticed you shortened the swinger around 5". I would rethink making a new subframe until that shorter swinger is on there. Not only will it lower your seat height by the 2.5" you want, but it will probably stiffen your rear shock up a ton as well. That should mean you'll end up running less spring tension, which should also allow you to drop the rear some.
2007 YAMAHA YTZ450 went to a great home RIP Sam
Always finding new and exciting ways to not give a hoot in hell
Catch me if you can
OK, Heres the final ones for now.
Pic#1: Just another close up of the on joint.
Pic#2: Another view of the gussets behind the shock mount and also the joint that runs on the top next to it.
Pic#3: Some bottom welds and a good view of Louis' jig he made to send the swinger to me.
Pic#4: Final one, just a good over all shot.

 Reply With Quote