
Awesome job!

 At The Back Of The Pack
Arm chair racerAt the back of the pack
At The Back Of The Pack
Arm chair racerAt the back of the pack
Awesome job!
At The Back Of The Pack
Arm chair racerAt the back of the pack
looks really good nice job
Power User
Got the holeshot
Looks great Bryan, I've always loved the flat track tires.
Time to throw a chain on her and let her rip!
What else needs to be done before its ready to go?
1985 Honda 250r x2
1986 Honda 250r
1986 Honda 250sx
1985 Honda 250sx x2
1985 Honda 350x x2
1986 Honda 350x
1984 Honda 125m x4
1983 Honda atc 70 w/ Lifan 125
1984 Honda atc 70
Yamaha tri zinger
Yamaha 4 zinger
Brap braaaap
http://www.youtube.com/user/3wheelsoffroad
Power User
The day begins with 3WW
Waiting on a rear sprocket. I somehow ordered one for a 85 instead of my 86. I'm also waiting for another airbox tube from Mr. Clean. I ripped my other one trying to get it over my 39mm carb. Double check everything and let it rip.
'86 ATC 250R, Build Thread http://www.3wheelerworld.com/showthr...highlight=250r
'86 "Factory Tri racing" Tri-Z http://www.3wheelerworld.com/showthr...b-Top-Tank-ect
Pile of Tecate Parts
My Feedback Thread: http://www.3wheelerworld.com/showthr...edback-for-bkm
Just Too Addicted
Arm chair racerJust too addicted
I used a rubber pipe reducer from Home Depot to put on stock air tube. The big end slipped right on the carb and I had to shave the the small and for the tube to slide over. It looks stock and works great.
Power User
The day begins with 3WW
I'll have to look into that. Thanks
'86 ATC 250R, Build Thread http://www.3wheelerworld.com/showthr...highlight=250r
'86 "Factory Tri racing" Tri-Z http://www.3wheelerworld.com/showthr...b-Top-Tank-ect
Pile of Tecate Parts
My Feedback Thread: http://www.3wheelerworld.com/showthr...edback-for-bkm
Just Too Addicted
Arm chair racerJust too addicted
I had to trim the tube at an angle to get it to fit right.
Power User
The day begins with 3WW
I'm thinking a metal sleeve inside the small end to keep it from crushing would be a good idea. Thanks again for this.
'86 ATC 250R, Build Thread http://www.3wheelerworld.com/showthr...highlight=250r
'86 "Factory Tri racing" Tri-Z http://www.3wheelerworld.com/showthr...b-Top-Tank-ect
Pile of Tecate Parts
My Feedback Thread: http://www.3wheelerworld.com/showthr...edback-for-bkm
Just Too Addicted
Arm chair racerJust too addicted
http://www.siliconeintakes.com/
Check out this site. They have all kinds of adapters and angled piping you might find exactly what you need. Its where I bought the stuff for my Tri-z.
85 Tri-z Power valve on Inverts
85 Tri-z Basket Case
01 gsxr750 engine/Tri-z frame (long long way from complete)
Power User
4 Wheels? Huh?
It looks totally awsome man!! Glad to see all the nice stuff being put to use!! GO CHEIFS!!!
MY FEEDBACK THREAD- http://www.3wheelerworld.com/showthr...ight=aldochina
Power User
Catch me if you can
When those "2 hours" are up it would be nice to see some pics!
Power User
The day begins with 3WW
How about a ride video?
'86 ATC 250R, Build Thread http://www.3wheelerworld.com/showthr...highlight=250r
'86 "Factory Tri racing" Tri-Z http://www.3wheelerworld.com/showthr...b-Top-Tank-ect
Pile of Tecate Parts
My Feedback Thread: http://www.3wheelerworld.com/showthr...edback-for-bkm
Power User
The day begins with 3WW
Finally done and ready to race.

'86 ATC 250R, Build Thread http://www.3wheelerworld.com/showthr...highlight=250r
'86 "Factory Tri racing" Tri-Z http://www.3wheelerworld.com/showthr...b-Top-Tank-ect
Pile of Tecate Parts
My Feedback Thread: http://www.3wheelerworld.com/showthr...edback-for-bkm
Side-hilling son of a gun
Got the holeshot
Looks Great Brian, I am honored to have been a part of this build. I really like to see them come together and cant wait to see better pics and race pics!!
Little advice when taking photos of it. You want to shoot for the "perfect lighting". Early AM or late afternoon ~ half hour post-sunrise or pre-sunset, the "subject" will glow with that lighting, Mrs. Clean taught me this.
Somewhere fireworks went off and there was a celebration when you called it complete!!!
Power User
The day begins with 3WW
Mike I can't thank you enough. You were a very big part in it getting to where it is today. I'd also like to thank everyone who helped out with advise or sold me great parts for the build.
Yesterday was it's maiden voyage and well it didn't come without it's fair share of little hicup's that can all be traced back to the builder. Not 30 yards out of the pit's the bolt for the front sprocket came out and the sprocket embedded itself into the TM Designs chain slider. Found the bolt and washer and after a little prying, got the chain back on, then I chased carb isuues all day and finally got it running repectable, but I'm still not convinced it's not ignition related, because it will clear up and then sputter in the mid to top end. Next was a constant chain loosening. I tightended down the pinch bolts on the Westcoast, but it seemed to continually work itself loose. Then my homemade radiator shroud bracket cut the top radiator hose and ended the day.
I'd like to thank my boy, yeagerb, for the assistance yesterday. He was the best crew chief/pitman a guy could ask for. I felt bad because we wrenched on my bike for about 3/4 of the day andhe didn't get much riding time in.
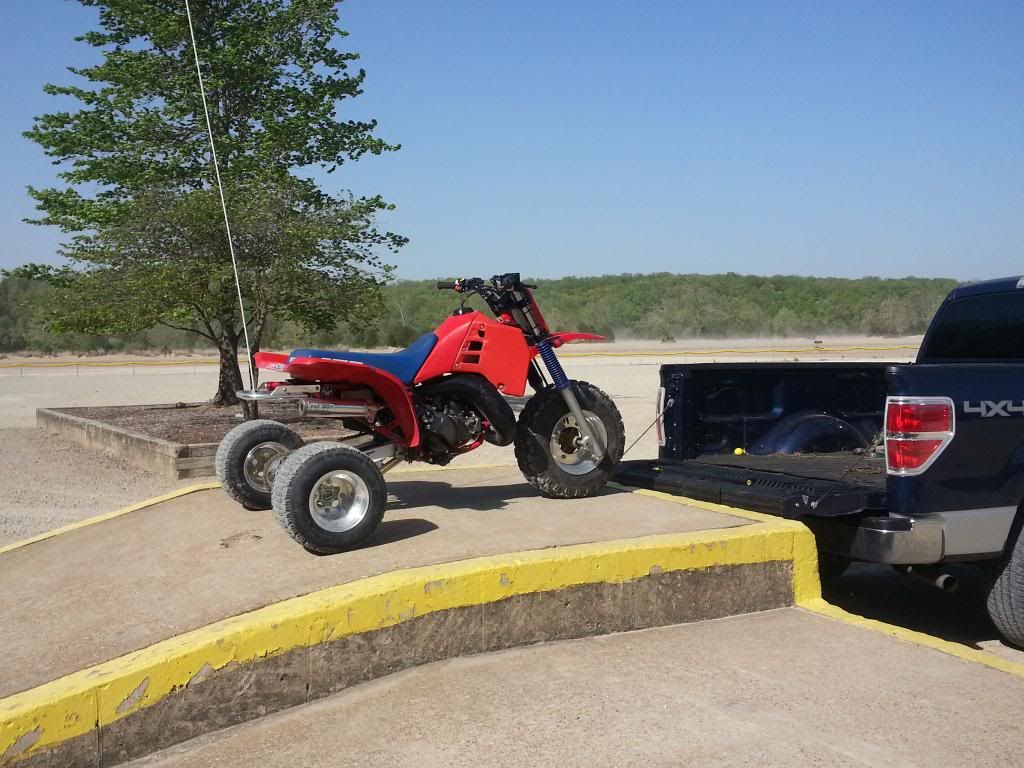
Now it's dirty and I couldn't be happier to have ridden it instead of it living the rest of it's life in a garage. Now I can concentrate on riding it instead of scratching it.
Here it is getting ready to go home for the night.
'86 ATC 250R, Build Thread http://www.3wheelerworld.com/showthr...highlight=250r
'86 "Factory Tri racing" Tri-Z http://www.3wheelerworld.com/showthr...b-Top-Tank-ect
Pile of Tecate Parts
My Feedback Thread: http://www.3wheelerworld.com/showthr...edback-for-bkm

 Reply With Quote

